
ServiceSight allows you to categorise the work you do into job types. Each job type can have a unique name, description, charging structure and even report to different sales revenue codes in your accounts system. You can create as many job types on ServiceSight as you need and configure them in any way you like.
- To add a job type simply go to Settings | Job | Job types.
- Click ‘Settings’ by your avatar in the top right-hand corner, then select Job from the list that opens on the left. Then choose Job types to open the list of previously defined types. You can use this list to access existing job types so they can be edited if needed.
- Click the green ‘New job type’ button to create a new one.
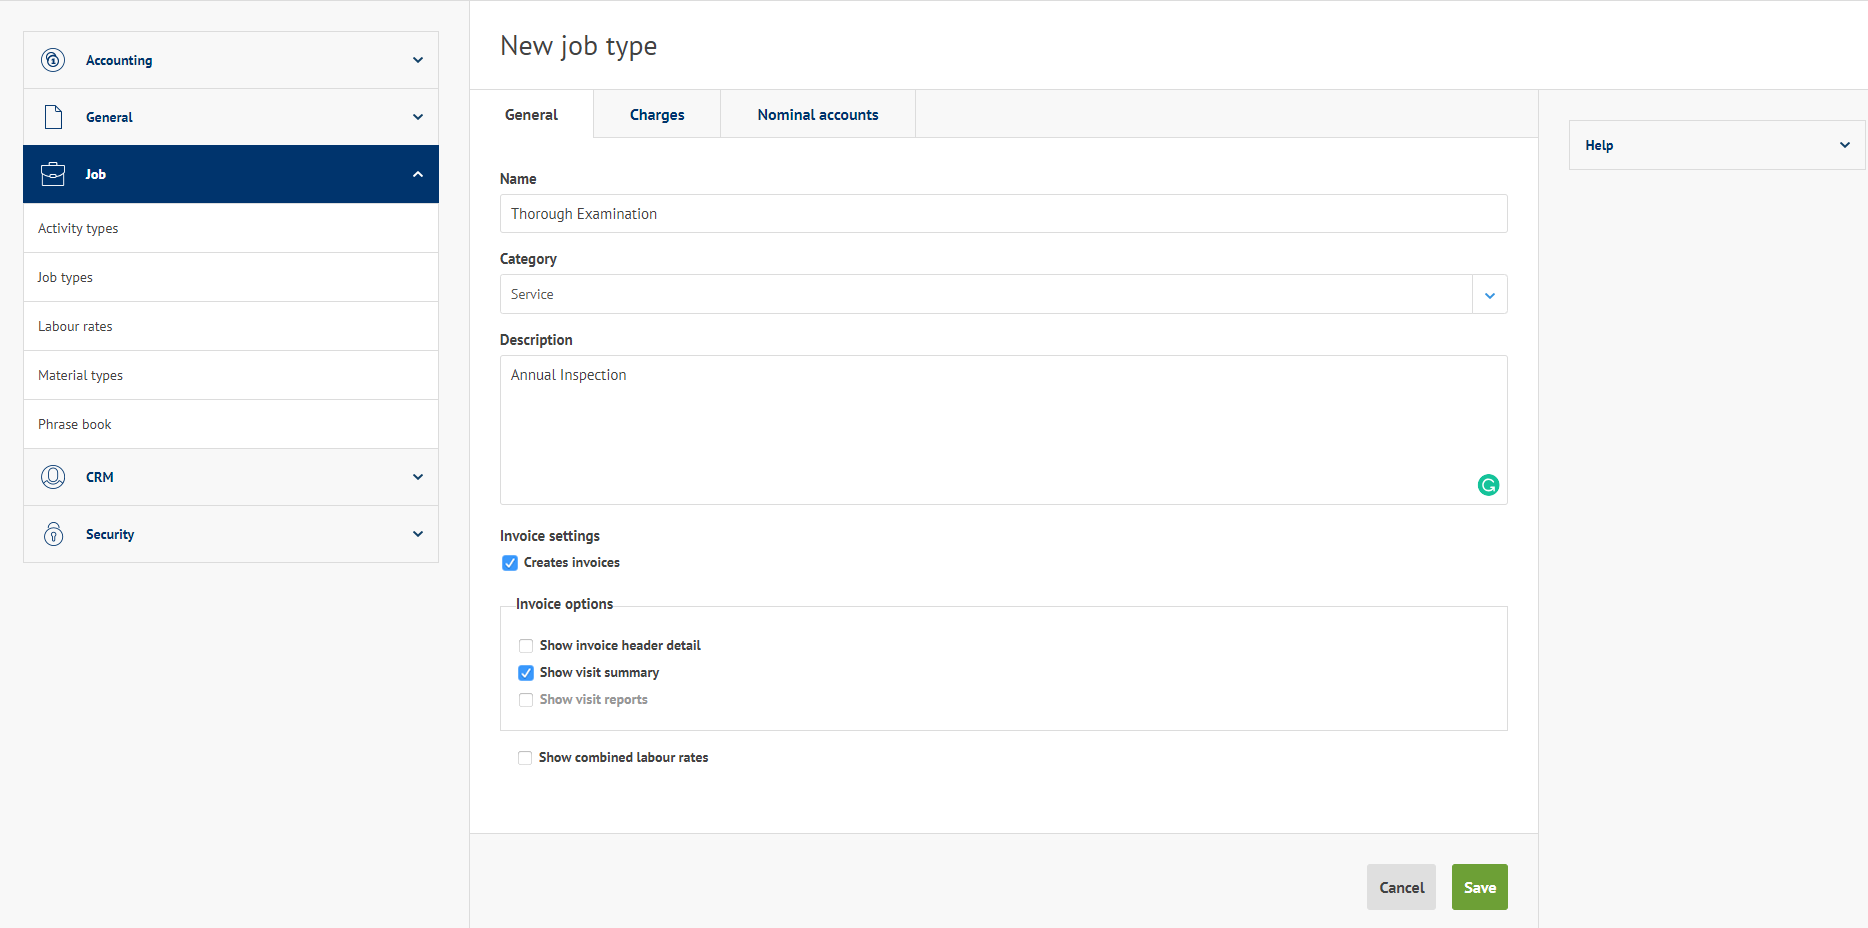
- The ‘New job type’ screen opens.
- There are three tabs – General, Charges & Accounts. Starting with General enter the name for this new job type e.g. Call Out, Repair or Service.
- Next, select the category that this new job type belongs in. This is a fixed list of Call Out, Repair, Service & Abuse. The Call Out category will calculate a due date for jobs created of types in this category based on the response time in the Settings. Service is used to differentiate planned service work from reactive and should be used on any job types of this category. Abuse is reserved for types such as customer damage & vandalism. Repair is the catch all category and should be used for any job type that does not easily fit into one of the other three categories.
- Next, you can enter an optional description to describe what this job type is for an how it operates.
- In the Invoice settings section the first option ‘Creates Invoices’ allows you to choose whether this job type is one that raises invoices or not ie is this job type chargeable. For example if the new job type was a warranty job we may untick this field so that the system know not to charge for jobs of this type.
- If this type is chargeable you can then select further options for the level of detail you would like on the invoices for jobs of this type:
- Show invoice header detail – This allows the addition of a large text field to the invoice where users can enter free text to add as a header paragraph to the job invoice.
- Show visit summary – For the labour element of the job the system will simply show the visit date and the number of hours as well as the charge but not show any other detail.
- Show visit reports – This option lists the labour visits out individually and includes the engineer’s report from the mobile app.
- Show combined labour rates – Summarise – This option allows you to reduce the level of detail on the invoice about on site hours to a single line called ‘Labour’ with a value at the end.
- It is important to note that these options only act as defaults and can be reselected on each individual job as you complete & invoice them, combined with the ability to preview invoices on jobs whenever you like – so you can customise the invoice as you need on each job.
- Once you have finished with the General tab you can click on the Charges tab.
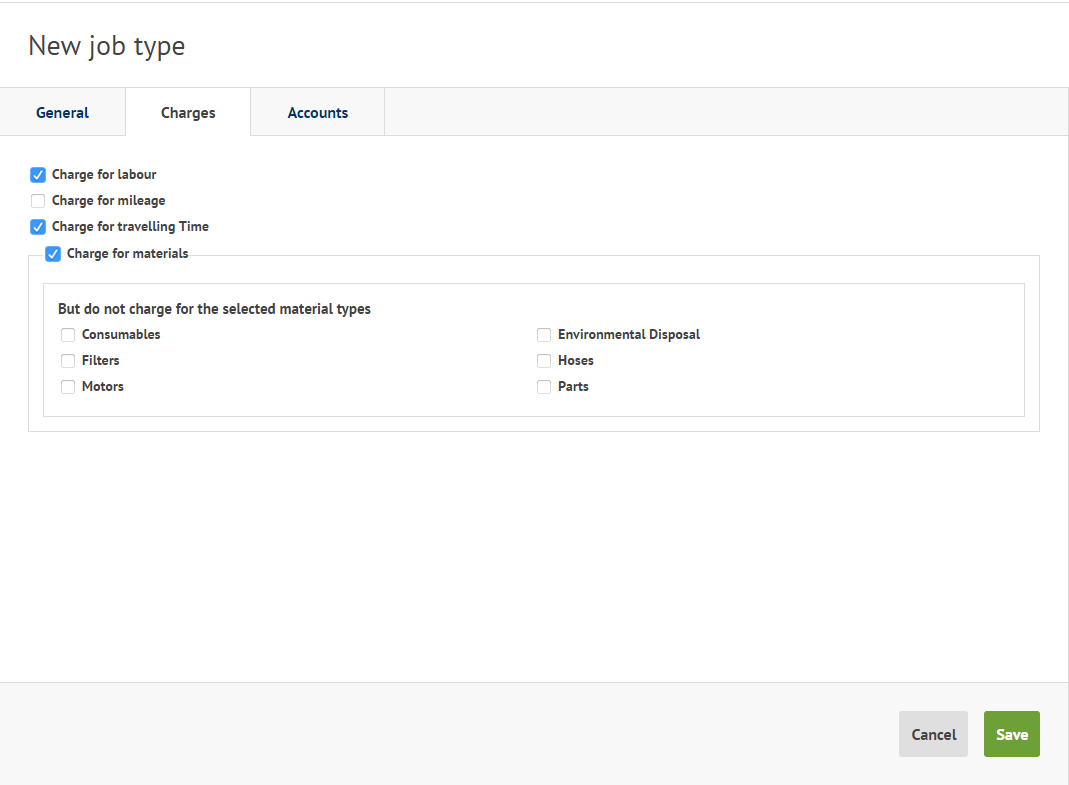
- Here you can tell the system how this job type is charged for. For new job types ServiceSight will always default to full chargeability ie it will charge for labour, mileage, travel & materials unless you configure the job type differently.
- To do this simply ‘untick’ the relevant boxes. In the above example we are not charging for mileage so we have unticked that box at the top of the screen.
- With materials there are further choices as well as charging or not charging. If you are charging for materials you can then choose to not charge for selected items based on the material type. For example, in the above screenshot if I wanted to charge for all materials except consumables on jobs of this type I could simply ‘tick’ the consumables box. All other materials would be charged for but the system would know not to charge for consumables.
- Once you have completed your selections click the Nominal accounts tab to progress.
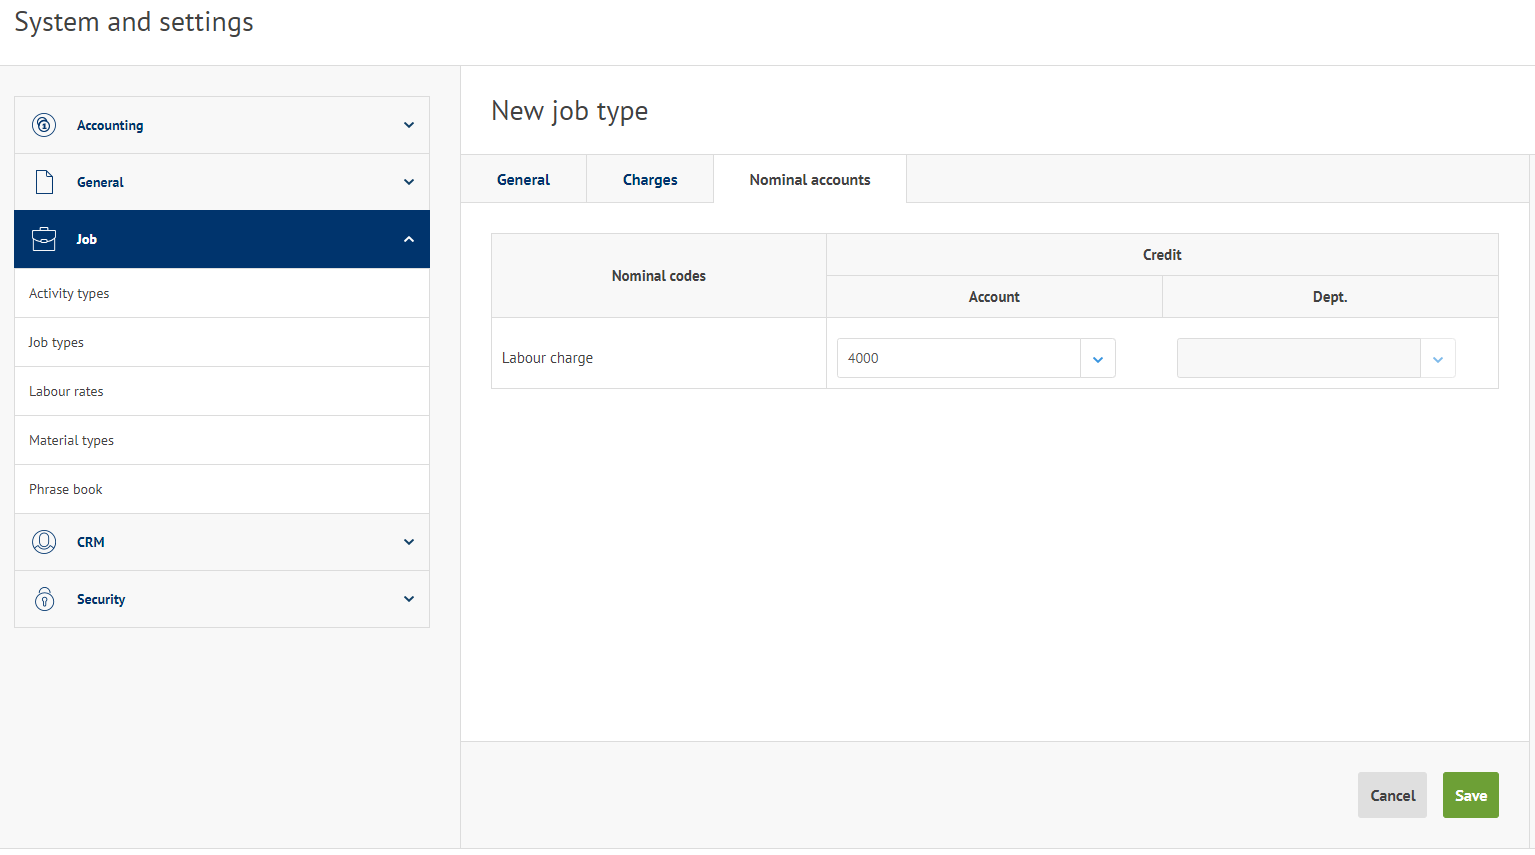
- Use the drop-down list to pick the code you need from the list of your nominal codes that has been imported from your accounts system. This will be the default sales code for your labour charges.
- Use the green ‘Save’ button to save your entries and create this new job type in the system.
NB Remember to check the green ‘Save’ button at the bottom of the screen to ensure you do not lose any detail you have entered. Any changes need saving before leaving the customer screen.
If you hover your mouse over the button and it changes colour and a hand icon appears then there are changes that need to be saved. If it does not change colour and remains an arrow pointer then there are no changes that need saving.
- You will receive a green feedback message to let you know your new job type has been saved successfully.
- To create further Job types simply click the Job types option on the left-hand menu again to return to the list of types. Then use the green ‘New job type’ button. If you have finished creating job types simply navigate away from this form by choosing the correct option on the main menu bar.