Supplier Details
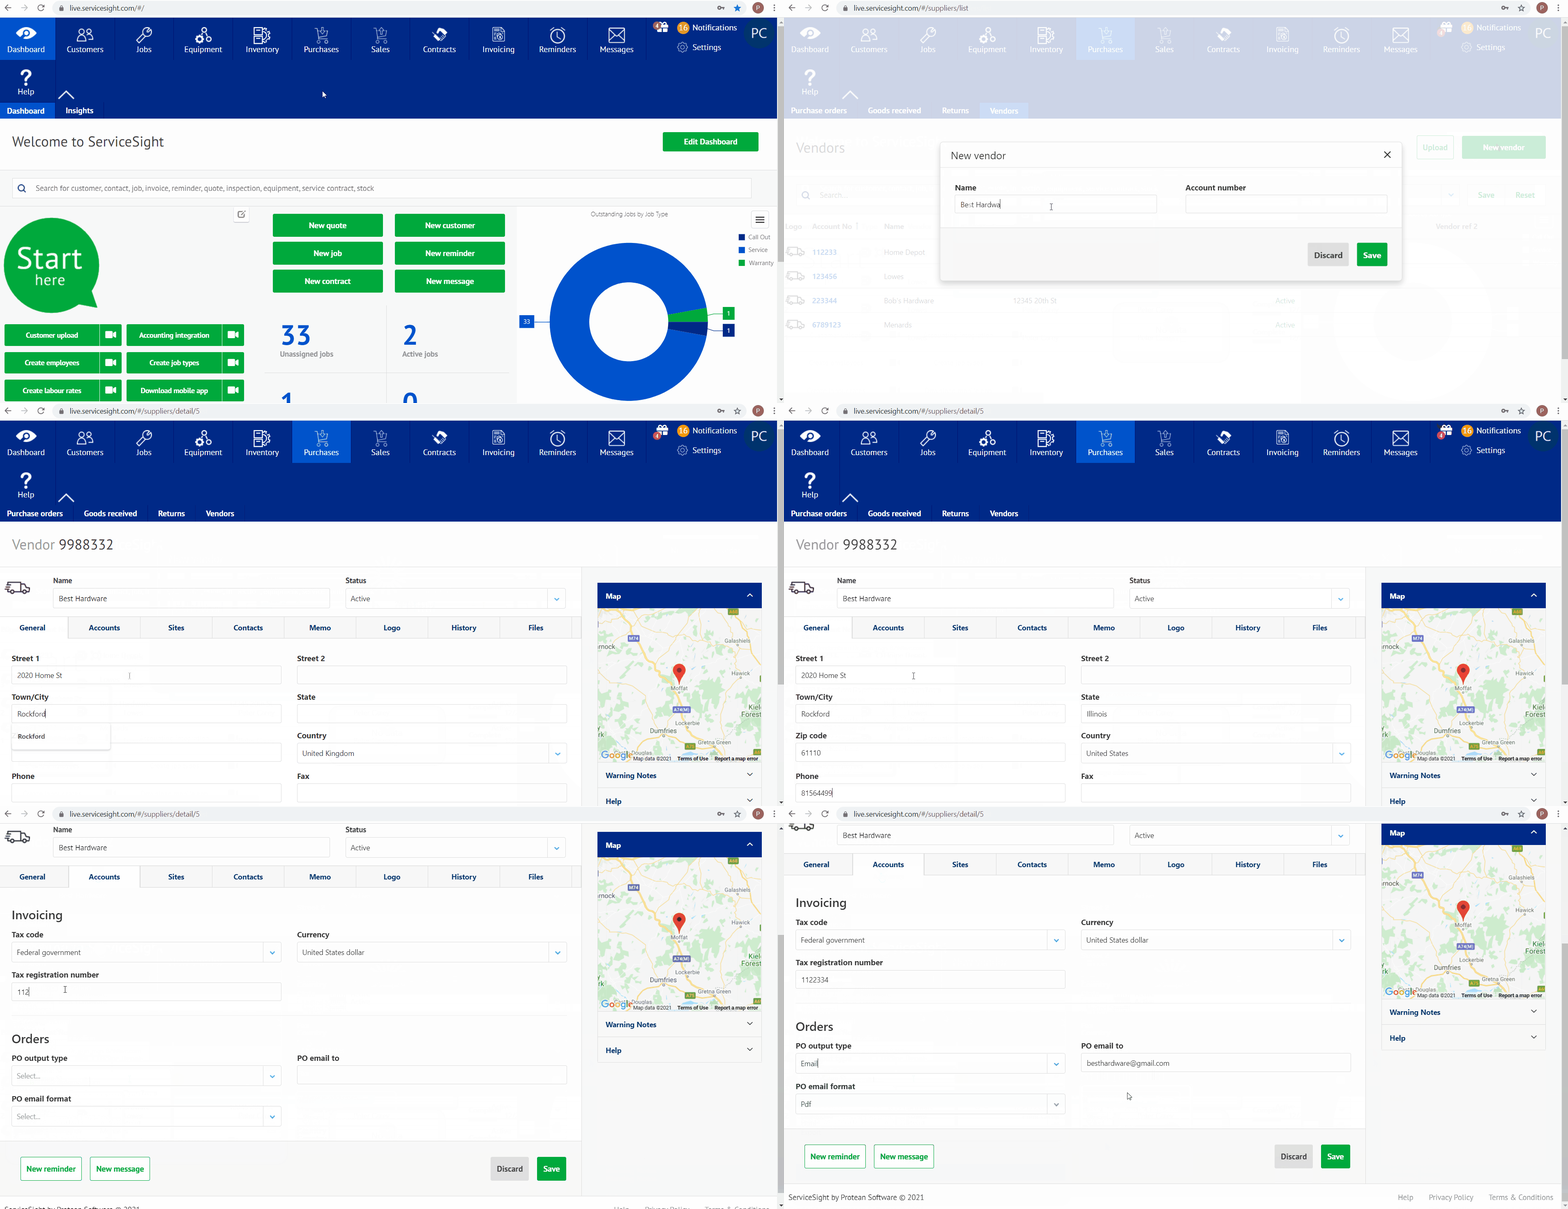
Supplier details are added or edited to show any current information that is new or updated to reflect changes for any stock suppliers you utilize. The details can be added or changed in the Purchases tab, under the sub-tab “Vendors”
Supplier Details
- Select the Purchases tab on the tool bar at the top on the home screen.
- On the purchases screen, select the sub tab labeled Vendors.
- Once selected, choose either an existing vendor or select the green tab labeled “New Vendor”.
- If you selected a vendor, you then edit any of the details that are currently existing for that vendor. If you select “new vendor”, you will be prompted to enter the vendor name and account number.
- Once you enter the vendor name and account number, you will be taken to the vendor screen where you can enter the address for the vendor under the general tab.
- After the address, you will be able to add any phone or fax numbers, emails, and web addresses for the info.
- The next tab to access is the accounts tab. You can add any tax information for the vendor being created. Once that is filled out, you move down to Orders and enter any purchase order information. After you select output type, you can add your PO email format.
- Moving to the next tab will allow you to add a new site for the vendor. Select the green tab labeled “New Site”. This will give you a pop-up window to add the name of the site and the account number. When finished, select save.
- On the contacts tab, you will enter new contacts for the vendor you are adding. Select the green tab labeled “New contact” and you will get a pop-up window to enter the first and last name of the contact, followed by the phone number and email. When this is finished, select the save tab.
- The next tab is labeled Memo. This will allow you to enter notes under “Warning notes” regarding any issues under this. The other section is labeled “General notes”. You can enter any notes regarding the vendor at all.
- The Logo tab will allow you to add the vendor logo if you want. Simply select the tab labeled “select photo”. This will give you a pop-up window to select the file from. Once you have selected this, click the save tab.
- Moving to the history tab will allow you to view the history of the vendor and any interactions with that vendor.
- Last tab is the files tab. This will let you view and select any files regarding the vendor.
- When finished, select Save and this will create the vendor.

