
Creating Customers
There are several ways of starting the new customer creation process on ServiceSight. The best way for you depends upon your own preferences or your current location within the system. Firstly you can access this feature from the Dashboard, secondly from the Customer List screen and finally from within the New Job process, allowing you can add new customers as you create the job to save having to create the customer record first.
Creating Customers from the Dashboard
If you have the ‘Quick create buttons’ widget on your dashboard then you can use the ‘New customer’ button to begin the customer creation process.
Creating Customers Whilst Creating Jobs
If you begin the job creation process and find that the customer you need is not yet in the system you can add it from the New job screen by clicking on the blue link at the top of the Customer list that appears on this screen.
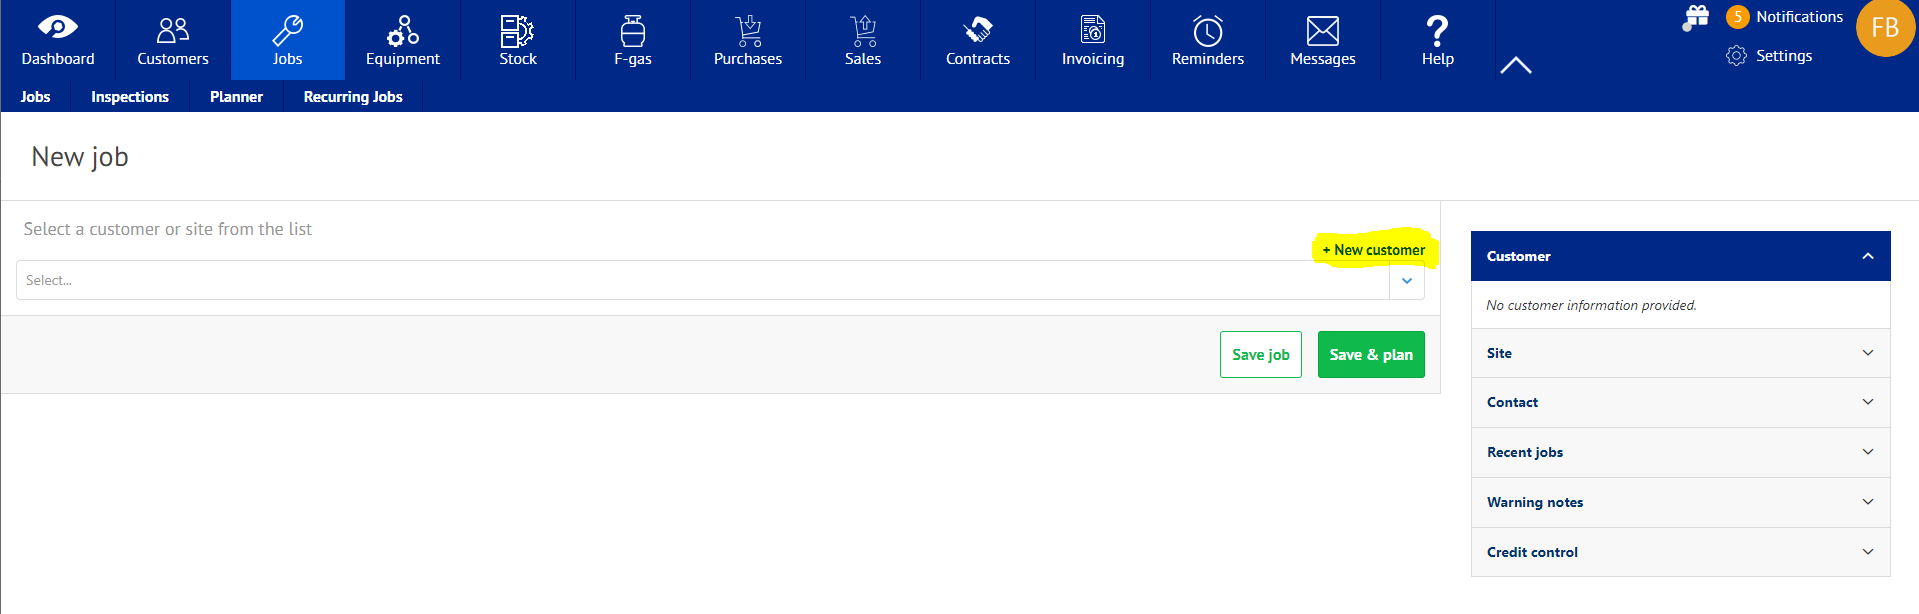
With any of these three methods using the ‘New customer’ button or link will open the New customer screen.
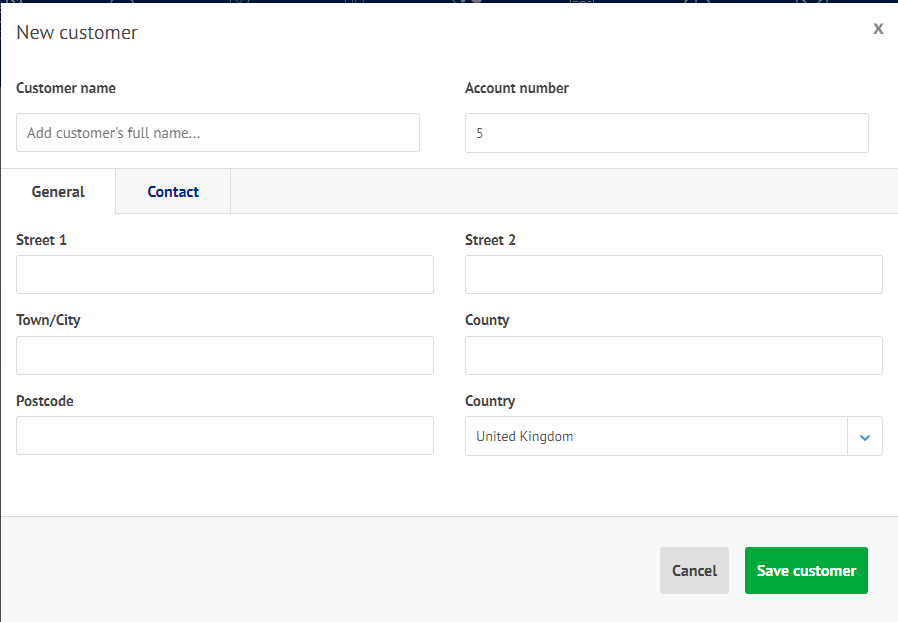
- Firstly, enter the Customer name e.g. Protean Software Ltd.
- ServiceSight will assign this new customer an account number. If you already have account numbers in use then overtype this automatic number with the account number of this customer you have already assigned. NB If you are linking to an accounts system then your customers can be imported into ServiceSight automatically.
- Then in the General tab enter the Street, Town, County & Postcode of this new customer.
- At this point you can use the green button to ‘Save’ the new customer record or you can switch to the Contact tab to add a contact name for this new customer.
- Click the Contact tab.
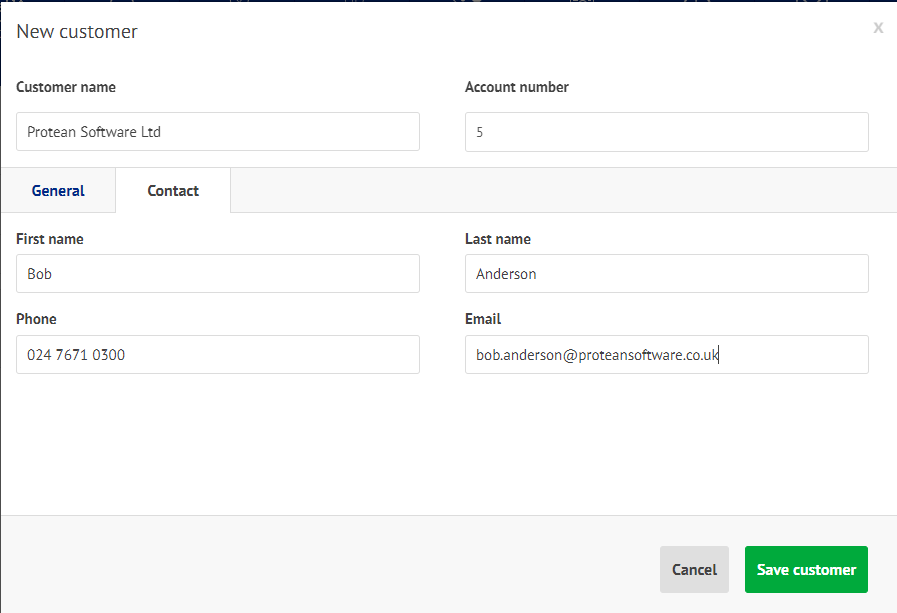
- Enter the initial contact for this new customer by filling in the First name & Last name fields. Note that further contacts can be created against this customer later.
- Enter the phone number & email address for this contact.
- Click the green ‘Save customer’ button.
The main Customer screen will now open containing the details you have already entered. You can now add further detail if you wish. There are six tabs on which you might enter further information about this new customer. This can be completed later if necessary.
The General tab
- Here you can add main phone & fax numbers as well as the general email & website address.
- There are also two user reference fields that can be used to store information that ServiceSight does not have a field for. In the example here we have used them to record the ‘industry’ & ‘region’ of the customer.
The Accounts tab
There are three section on the Accounts tab to assist with invoicing & credit control for this customer.
- In the Invoicing section you can specify the Tax code to be used for this customer ie are they VAT registered, are they a charity and so on. Different Tax codes can be created in ServiceSight to suit any situation.
- You can also specify the customers VAT Reg Number here if needed.
- For Sales Invoices you can specify the invoice terms this customer is to receive. The two options are: Invoice date plus x days or End of month plus X days where X is a value you can enter.
- If this customer can receive email invoices then enter here the specific email address to have the invoices sent to.
- In the Jobs section you can assign a Labour rate to charge when doing work for this customer. The new customer will default to your standard rate but you can select another rate you have already created by selecting it from the drop-down list.
- You can also specify if this customer requires an Order no to be shown on invoices. If so, you can select from the drop-down list which option you prefer for Order no reminders & checks. You can choose either ‘Required before job’; ‘Required before complete’;’Required before invoice’ or ‘Not required’.
- If you wish to charge a standard value for travel and/or mileage when carry out jobs for this customer you can set it up here. ServiceSight will still record the actual travel & mileage for your records but allow you to charge the customer a set figure. If these are left as zero then ServiceSight assumes you do not want to use this feature and charges for the actual travel & mileage instead (depending on Job type set up & configuration).
- In the Credit control section you can specify a credit limit if desired. ServiceSight will check this when new jobs are created and compare it to the customers current balance (brought over from your accounts system if you are linked) and warn you if they are encroaching upon it.
- There is also the possibility here of putting customers ‘on stop’ by ticking the box at the bottom of the screen. You will not be able to raise new jobs for customers who are on stop.
The Sites tab
This tab displays any Sites that exist for this Customer. New Sites can be created from here also. Sites are different locations to the Customer address where work is carried out but where the invoices go elsewhere. For example, if your customer’s head office was in Stoke, which is where you send the invoices, but they open a depot in Walsall you could create Walsall as a Site of the head office in Stoke.
Any existing Sites are shown in the list with their Account no, Name, Address, Contact, Phone & Status.
- To add a new site simply click the green ‘New site’ button.
- The New site screen opens and you can populate the name & address as needed.
- You can also add a contact at this stage, for this new site.
- Click the green ‘Save’ button to return to the customer screen and see this new site in the list.

The Contacts tab
This tab display a list of all contacts related to this customer, both those who work at the customer address but also those who work at the related Sites. You can also select from the list which contacts will serve as the Service contact (job related activities) and Accounts contact (financial enquiries). New contacts can also be added from here.
- To add a new contact to this customer simply click the green ‘New contact’ button.
- The New contact screen opens. Type in the First & Last name of the new contact.
- Then select a Title from the list you have previously created. This is an optional field.
- You can also enter Initials & Job title. The Customer name & Phone fields are automatically filled in by ServiceSight to help you as you have created this contact from within the relevant customer.
- Fill in the Mobile, Extension, Fax & Email information.
- There are two extra Reference fields at the bottom of the form for you to store information we do not have a field for. These drop down lists can be created in Settings | General |User References.
- There is also a second tab called ‘Memo’ if you need to record any free text about this contact prior to saving.
- Click the green ‘Save’ button to save your new contact and return to the customer screen.

The Memo tab
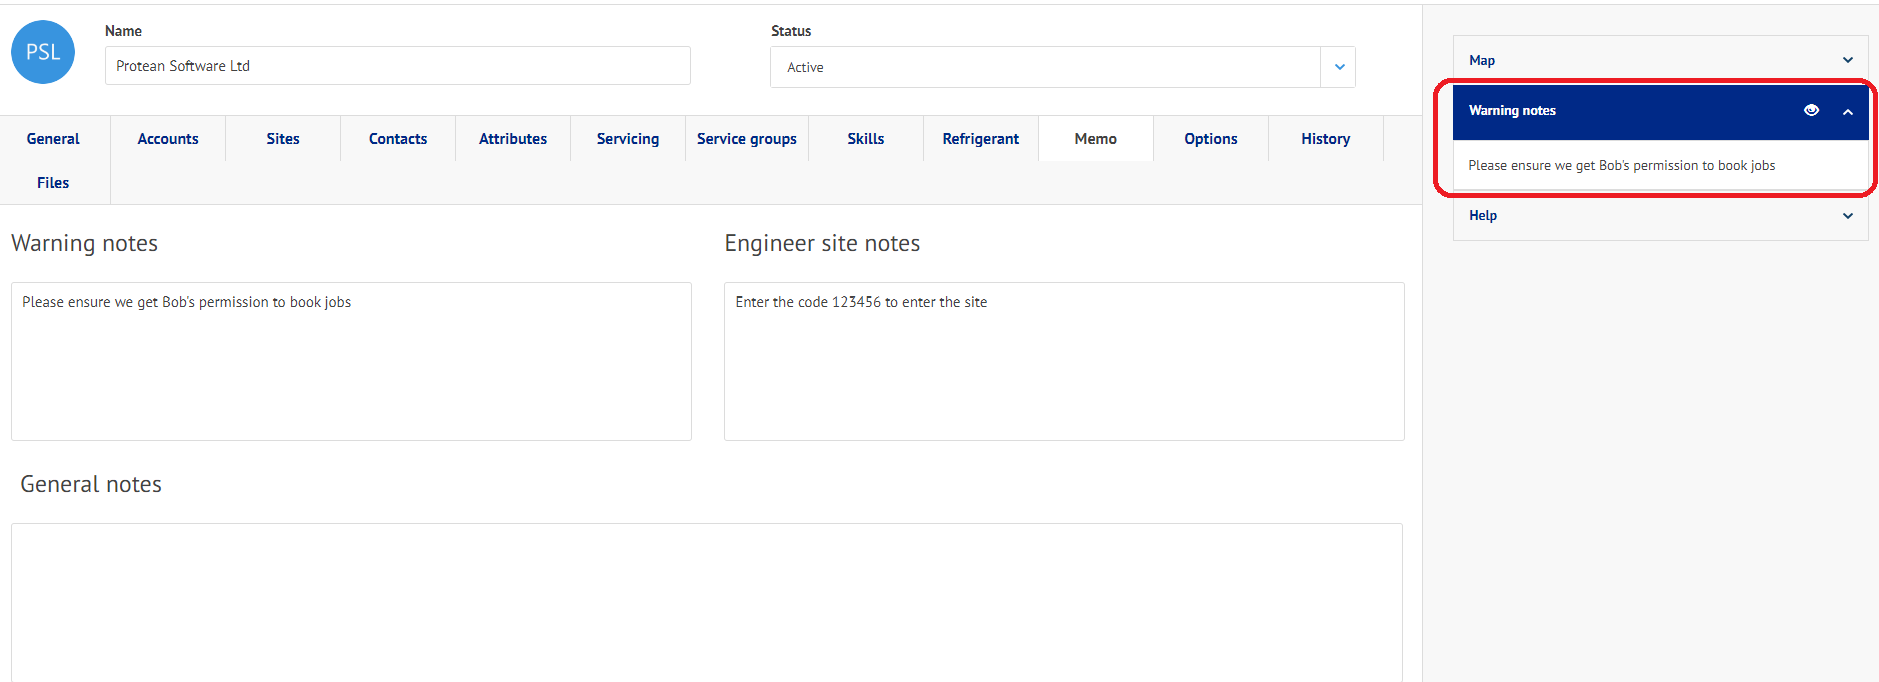
This tab contains two notes fields. Warning notes allows you to have text that will flag up when accessing this customer when creating jobs on ServiceSight. General notes allows you to store regular notes against this customer record.
- To add Warning notes simply type into the Warning notes field and save your changes by clicking the green ‘Save’ button.
- These notes will appear in the right-hand information panel when creating, viewing or updating jobs for this customer. An eye icon will appear on the warning notes section when there is a note to read.
The Logo tab
You can upload an image or customers logo onto the customer record to complete the set-up of a new customer. Note that the images must be jpeg or bmp format.
- To upload an image for a customer go to the Logo tab and click the ‘Choose file’ button under the coloured circle that contains the customer’s initials.
- A browse window opens allowing you to select the image. Click ‘Open’ to upload it.
- Click the green ‘Save’ button to see your uploaded logo. The logo is used on the customer list & customer screen to help identify the customer in question.
- You can remove the logo at any time in this same screen by clicking ‘Delete Photo’ or it can be replaced simply by selecting a new image in the same manner as the original.
You have now added all the extra detail that you might need on the system. Remember to check the green ‘Save’ button at the bottom of the screen to ensure you do not lose any detail you have entered. Any changes need saving before leaving the customer screen.
Once it has been saved you will see text confirming it has been saved.
