New Sites
New sites would is similar to adding new customers in ServiceSight. Customers are going to expand locations and this will help you with managing those and adding them as well.
New Sites
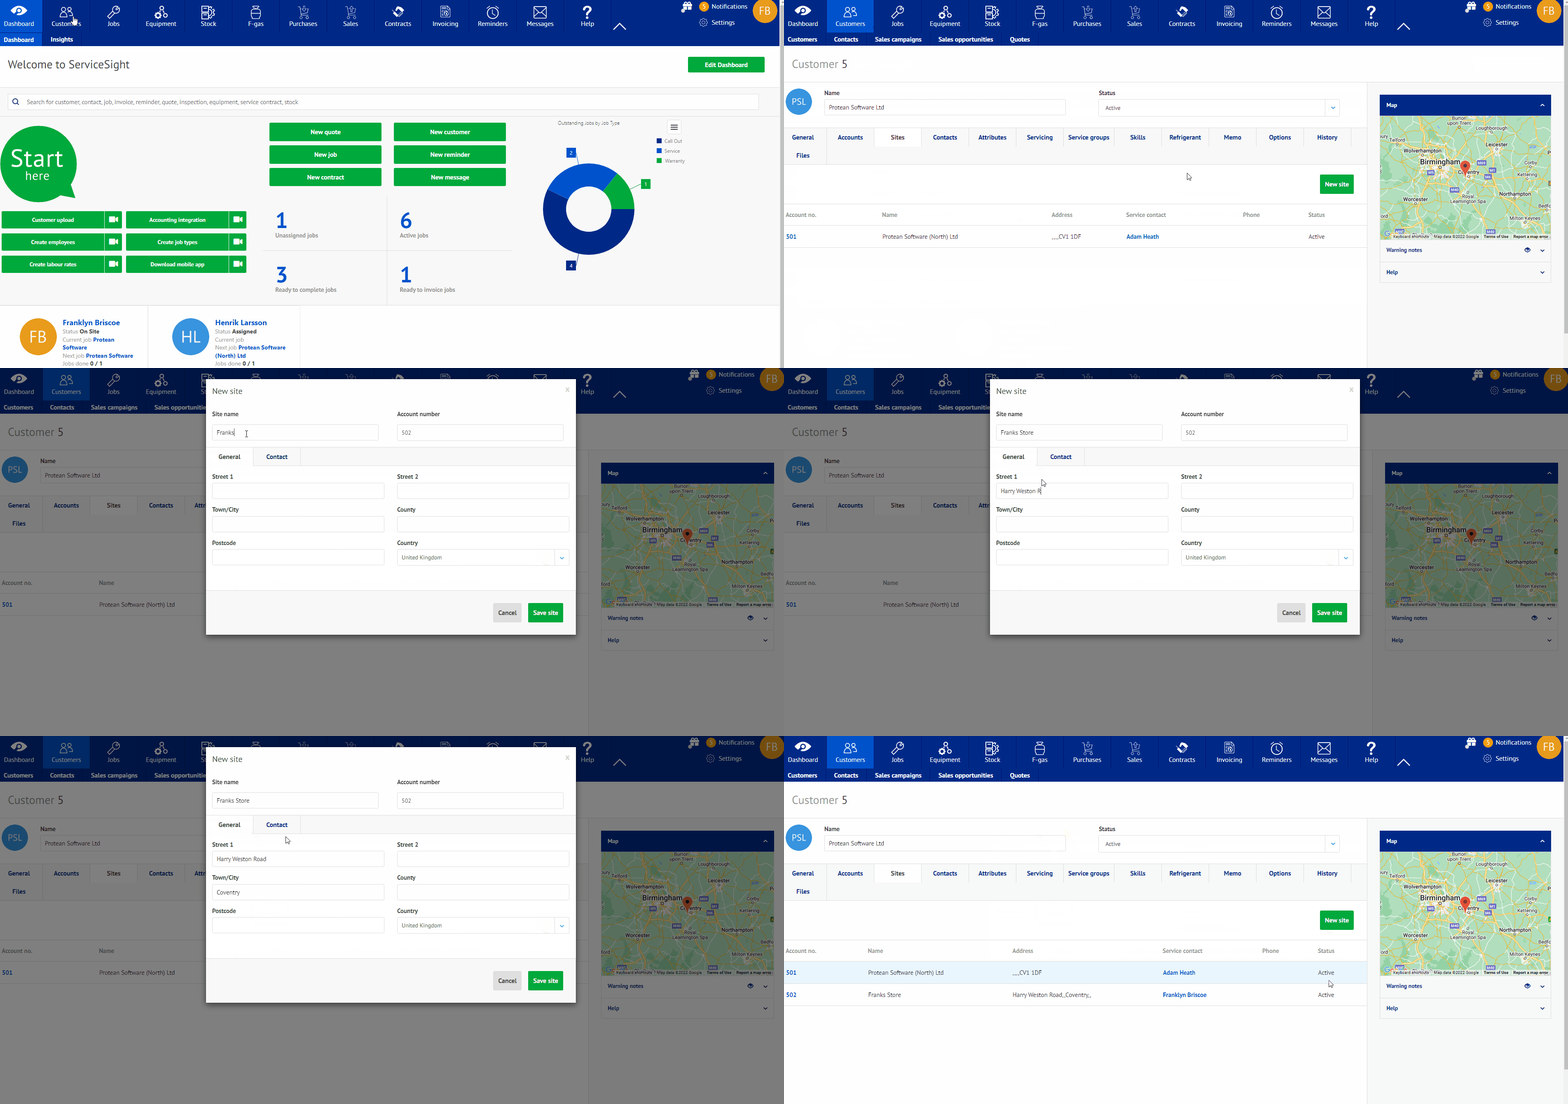
- On the navigation bar at the top of the screen, select the icon labeled “Customers”.
- Once selected, scroll down the list of current customers until you come to the one that has added a new site. Select the customer to move forward.
- After this has been completed, move across the tabs under the customer’s name until you come to one labeled “Sites”. Select this tab.
- On this page is a green tab labeled “New site”. Select this tab.
- Once selected, a pop-up screen will appear. At the top it will say “site name” with a text box underneath. Enter the site’s full name and then move to the general tab.
- Under the tab labeled general, select the first text box labeled “Street 1” Enter the street address and building number. Next, move to the tab labeled “Town/City” and enter this. Do the same for “Post Code” as well. After this is complete, select the drop down tab labeled “State” to select your correlating state as well.
- After this has been completed, select the tab labeled “Contact”. Then enter the customer’s First and Last name in the text boxes provided. Underneath, enter the locations phone number followed by the end users email address.
- When all of this has been added to the pop-up box, select the green tab labeled “Save site”. After this has been saved, the site will show up under the customer on the Customers list.

