To collect payments via the mobile app you first need to turn the feature on in the web app as well as allowing your engineers to raise invoices on the mobile. You will also need to have an account with Square and the Square app installed on the engineers’ mobile devices.
More information about Square can be found here.
To enable the ability to raise invoices:
- Click Settings from the service sight home page.
- Click Billing from the menu on the left of the screen
- Click ‘General’ from the next drop down options on the left.
- Choose ‘Settings’ & find and select the setting ‘Engineer App Job Invoicing Allowed’.
- Click ‘Yes’ & Save your changes.

The option has now been enabled.
NB You will need to carry out a full sync on the mobile app to pick up this change on the mobile device.
To enable the ability to take payments on the mobile:
- Click Settings using the option on the menu bar.
- Click ‘Accounting’ from the menu on the left.
- Click ‘Payments’.
- Change the payment provider to ‘Square’.
- Click and configure which payment types you wish to enable for the engineers. You must choose at least one and Save your changes.
NB You will notice that there is a link to the Square sign-up page available if you do not already have a Square account.
When you save your changes the system automatically enables the ‘Collect payment’ flag on every Customer record. If you do not want to collect payments from certain customers then you can disable this flag on the relevant Customer record screen.
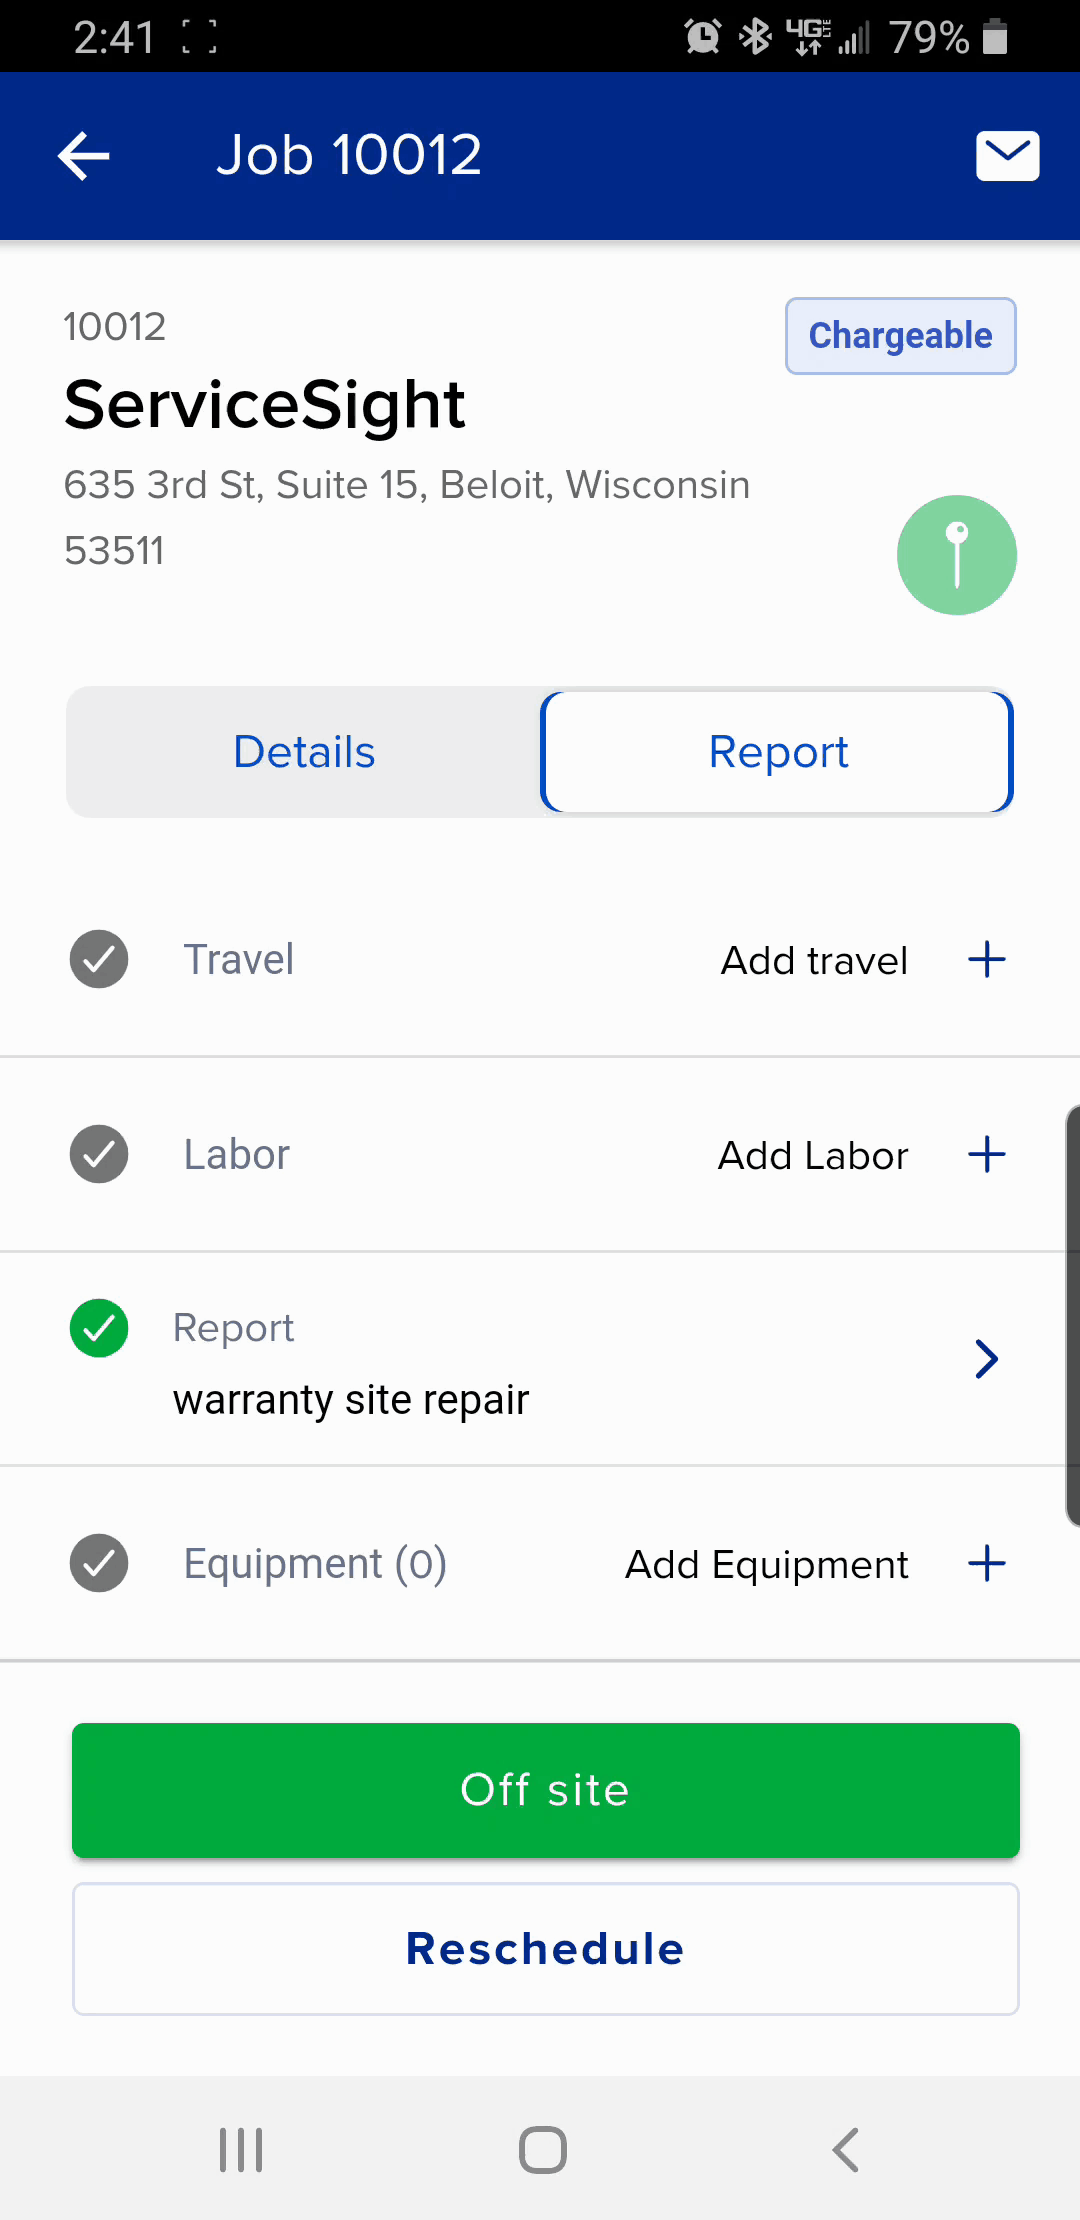
On the mobile app it is very simple to raise invoices for completed jobs.
- When the job is complete, go to ‘Sign Off’ as normal.
- The job sheet appears for checking.
- Click onto the ‘Signature’ tab and enter an Order No if required & choose the ‘Customer Name’.
- The ‘Email Address’ field will auto-populate if a Contact with an Email Address has been selected. If not, one can be manually entered. NB This is important as a copy of the Invoice will be sent to this email address.
- The ’Invoice’ check box should be ticked automatically but can be turned on & off here also. You will also notice a ’Collect Payment’ flag.
- Collect the Customer Signature & Engineer Signature as normal & tap the ‘Complete’ button.
- The job is completed in the web app & the invoice raised. These details are then passed back to the mobile app. The Invoice No & the Total Invoice Value are displayed.
- You also have the opportunity to display the invoice on screen and/or ‘Go to Payments’
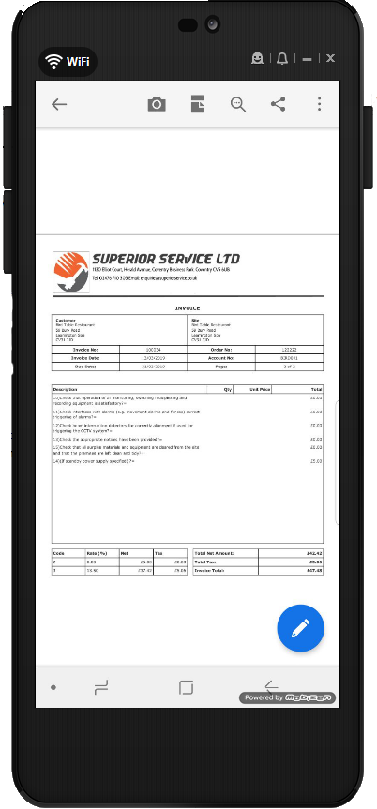
- You can also have display the invoice on screen as a PDF by using the green ‘Show Invoice’ button.
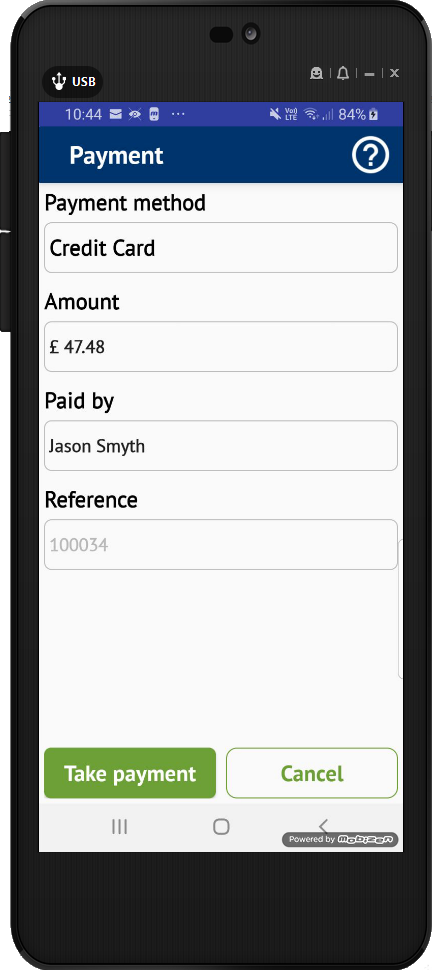
To Collect the Payment:
- Select ‘Go to payments’
- Choose your payment method. The ‘Amount’ & ‘Paid By’ fields are auto-populated.
- Your Sales Invoice number is populated as the Reference number for this transaction and the Contact selected is set as the payee. The email confirmation will be sent to this individuals emails address.
- Select ‘Take Payment’.
- The Square App opens automatically where the payment is processed. Receipts can be sent via email or text.
- NB if you do not yet have the Square App installed you will be taken to the Google Play store entry so that you can install it now.