Within ServiceSight you now have the ability to match supplier invoices & credit notes to goods received notes and return notes in ServiceSight as a Service Sight Pro user. Once matched the
invoices and credits are synchronised to the users linked accounts system.
Please note this includes support for Sage 50c and Quickbooks, with the Xero link following in
the next ServiceSight system release.
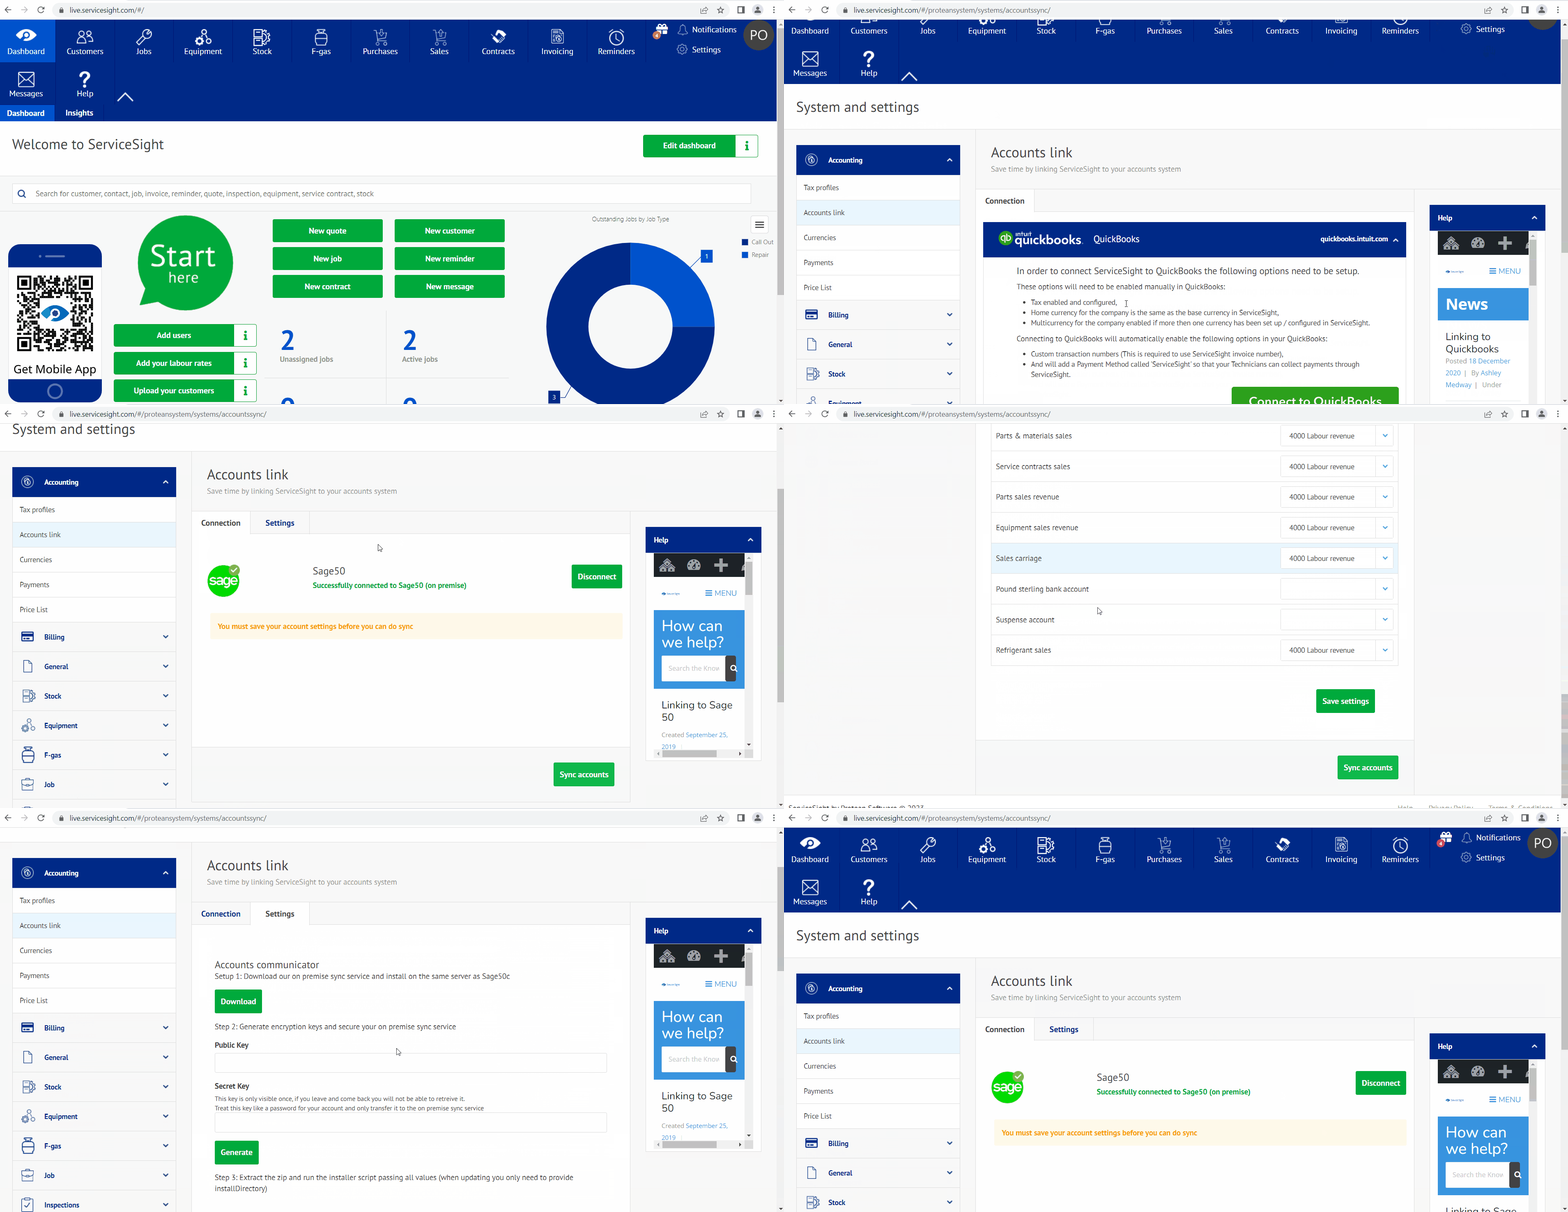
Accounts link settings
There have been new settings added to the accounts link so you will need to either configure these settings in order to use the new Purchase invoice matching functionality within ServiceSight.
To configure these setting just follow these next simple steps.
Click Settings from your ServiceSight home page.
Click Accounting from the menu to the left of your screen.
Click Accounts link & select the accounts package that you require go to the settings Tab and fill out the settings that your require.
Once you have completed the settings Press save settings and then press Sync accounts.

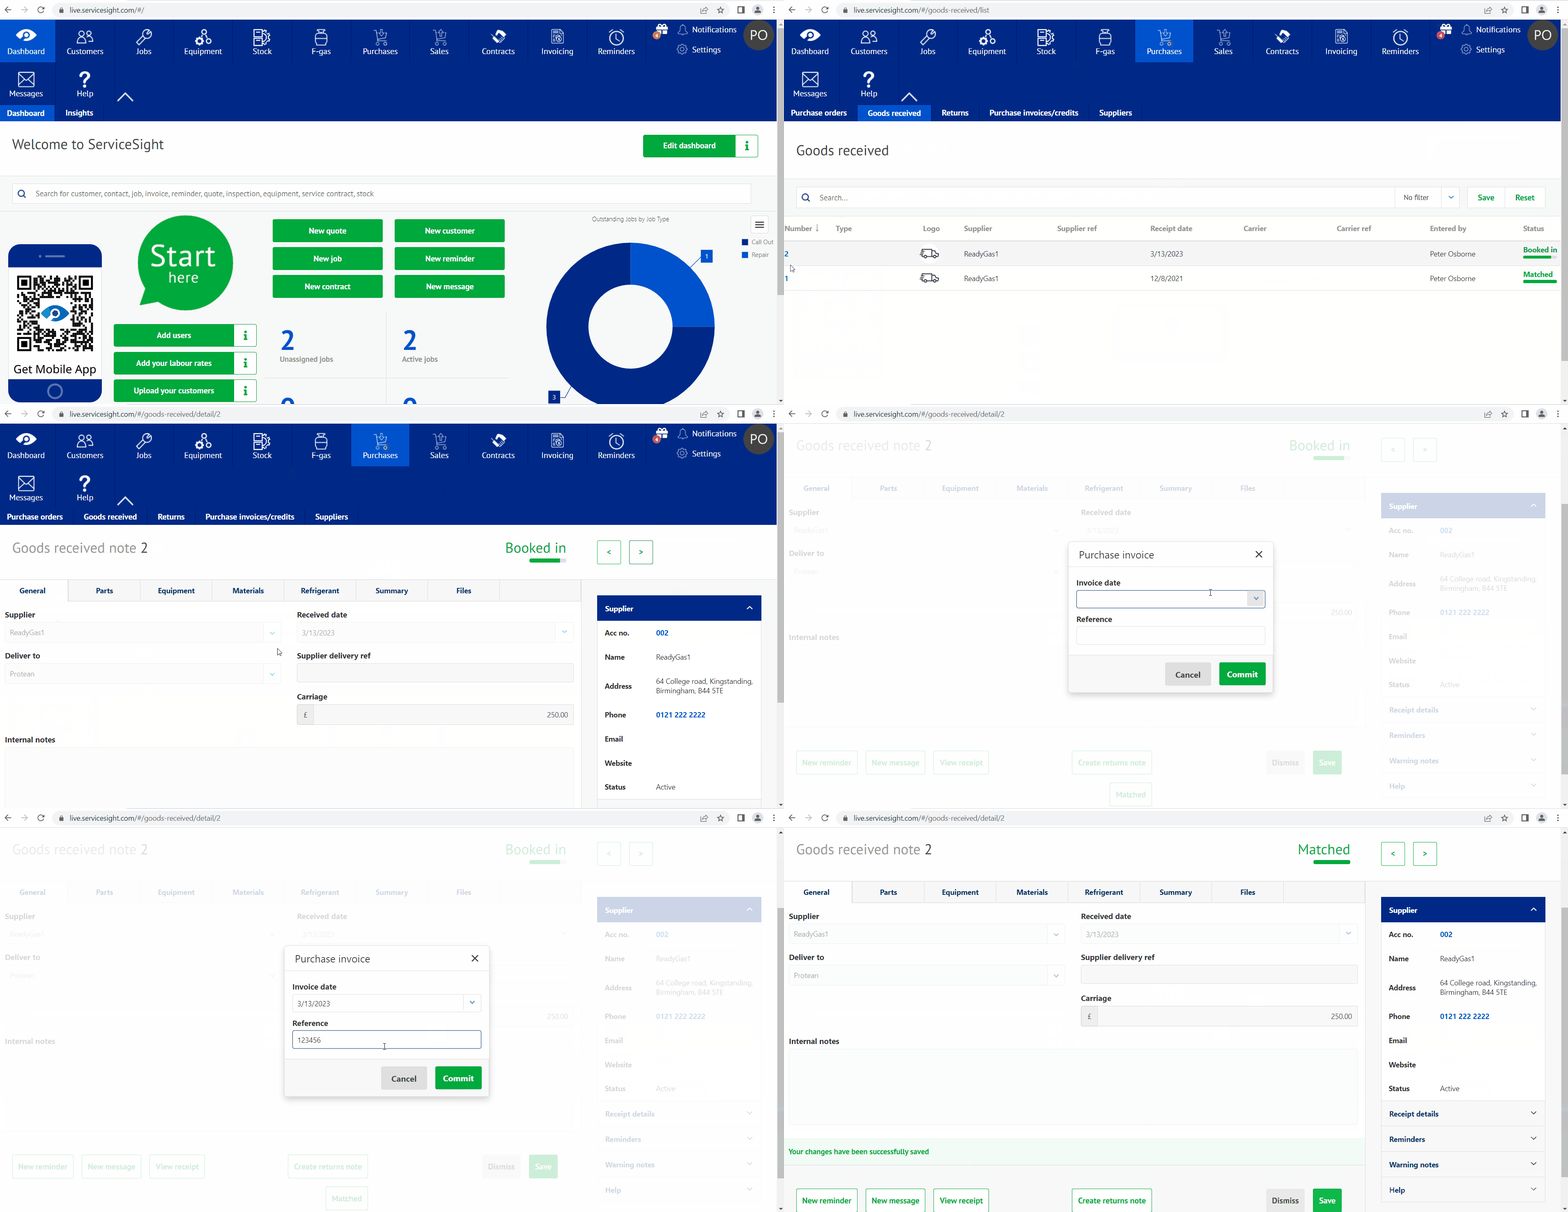
Manual Matching
As part of the introduction of PI Matching users also have the option of simply marking
GRNs and RNs as ‘Matched’ without having to create the supplier invoices on the system if
that is desired.
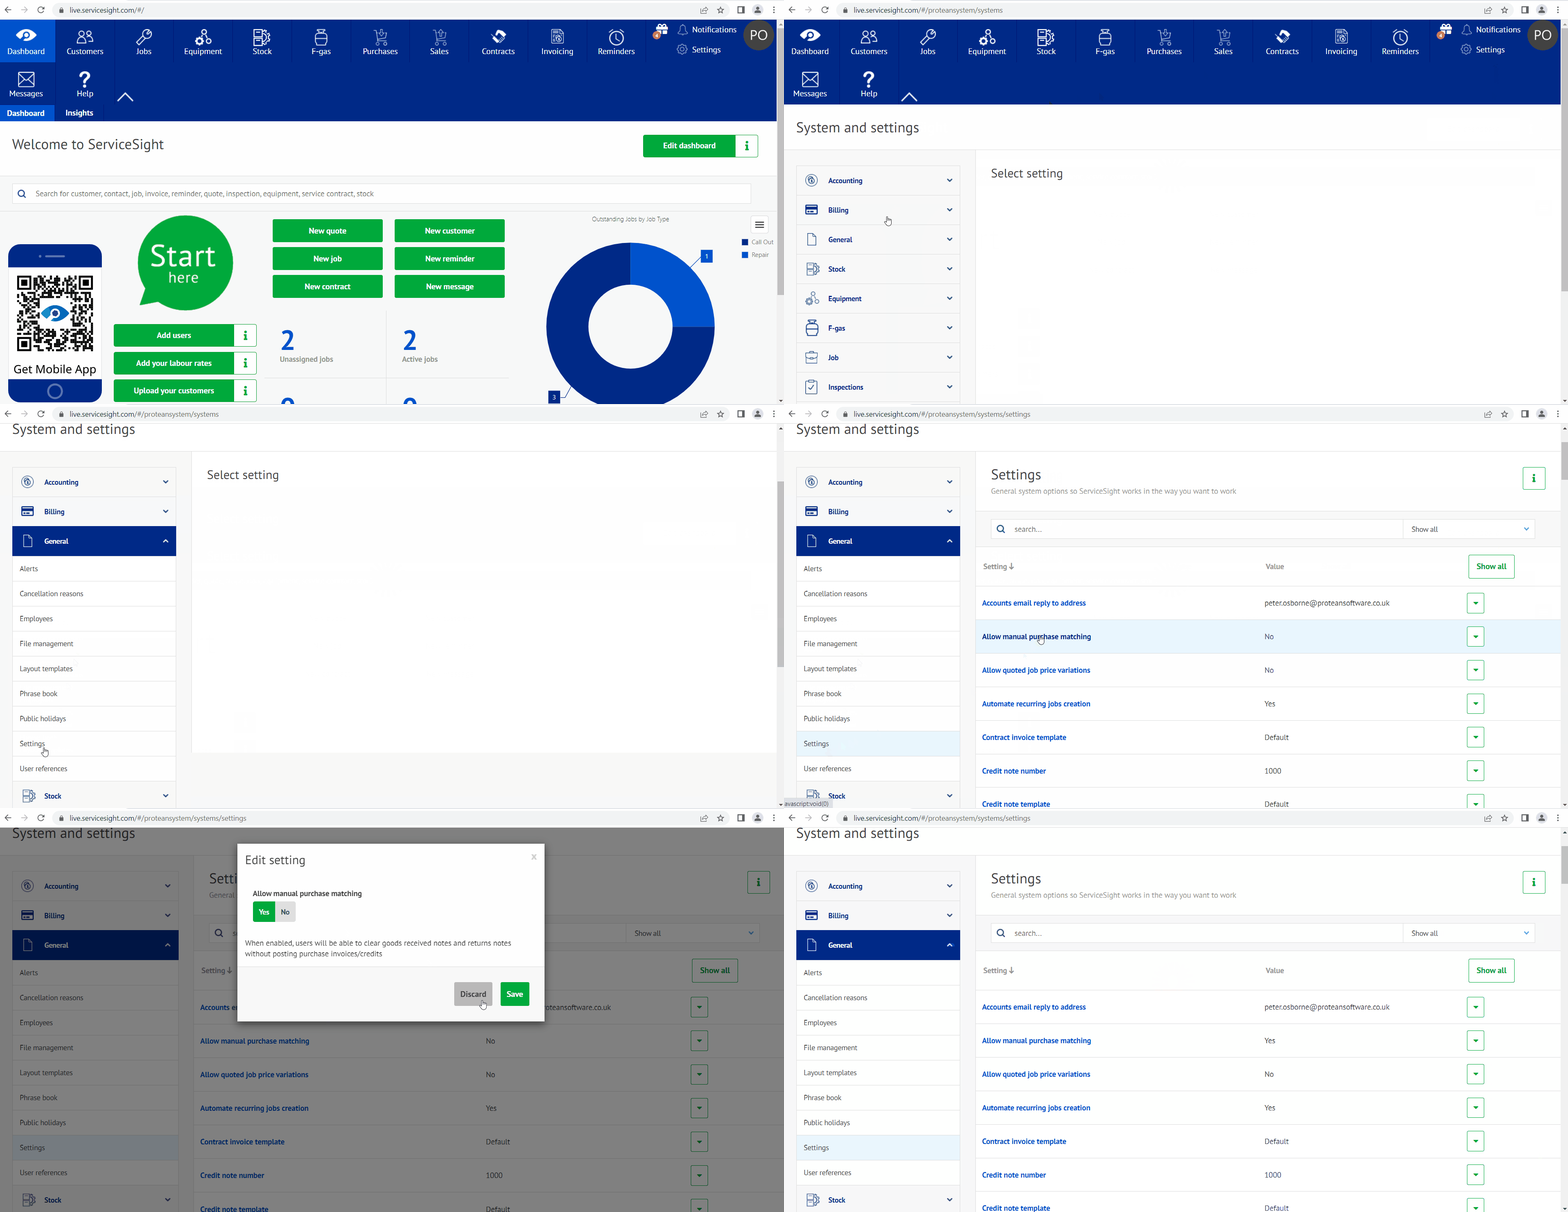
To enable the manual Matching ability just follow these next simple steps.
Click Settings from your ServiceSight home page
Click General from the menu to the left of your screen.
Click Settings from the menu to the left of your screen.
You will find a new option called Allow manual purchase matching.
To enable this setting you simple change this setting to show as Yes and save your changes as per the following short Clip.

By Default this setting is set to ‘No’ If changed to ‘Yes’ a new ‘Matched’ button appears on any ‘Booked in’ Goods received notes and ‘Booked out’ Returns notes.

Purchase invoice matching
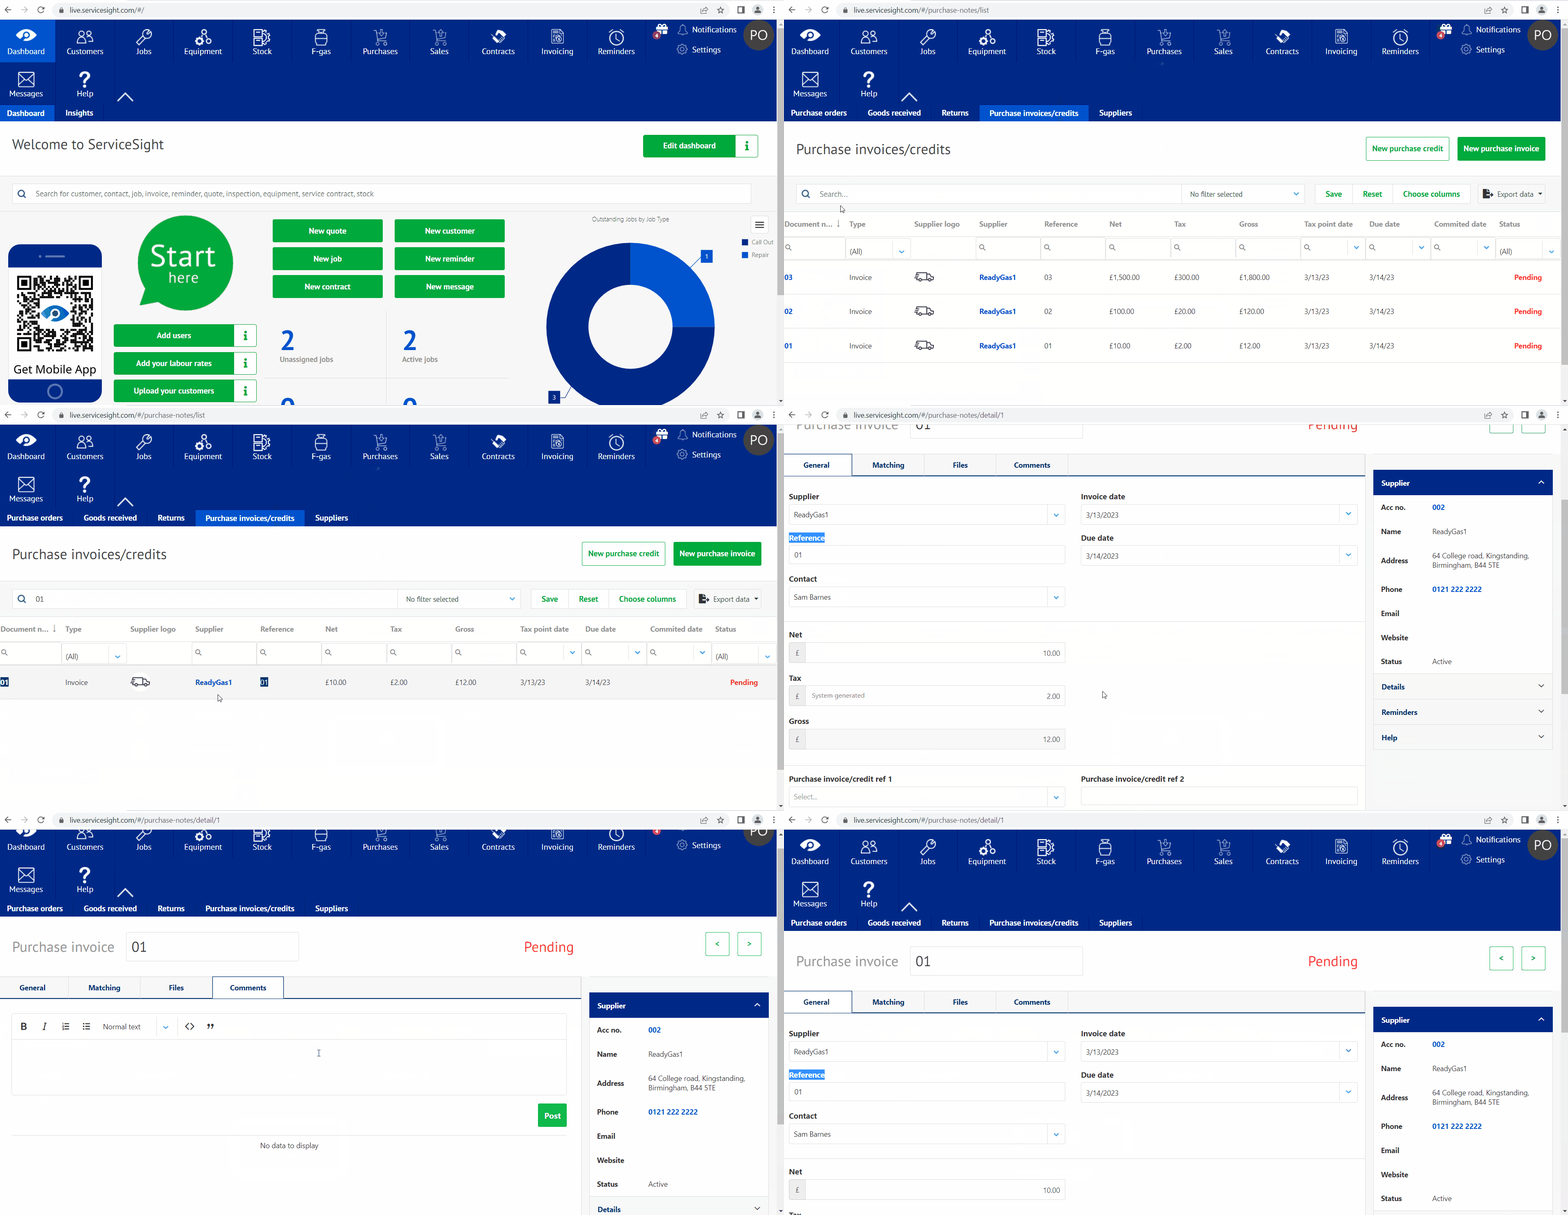
A new option has been added to the navigation bar for the Purchase module. Click the
Purchases icon to open it. The navigation options now include ‘Purchase invoices/credits’.
This will show you a list of purchase invoices and credits already created on the system.
This list has all the functionality of the other list screens, namely a search bar, sorting and filtering
options on each column, the ability to customise and save the list layout, the ability to
export data from the list and also to choose the columns you want to see in the list.
There are also two buttons available on this screen – ‘New purchase credit’ & ‘New purchase invoice’. To
add a new invoice simply click the button. The new Purchase invoice form will open. Here
you can enter the core details of the supplier invoice such as the invoice number, the
invoice date and payment due date, as well as contact and reference details and of course
the value of the invoice. Type in the Net value (ie before Tax) and the system will calculate
the tax & gross values for you. If the tax value is slightly out due to a difference in rounding
methods simply overtype the tax amount to match the document from the supplier.
There are also options here for flagging this invoice as falling under the Reverse Charge VAT
legislation and if this invoice is from a supplier operating in another currency you can also
check and update the exchange rate being used. If the exchange rate on the invoice is
different to that used on the Goods received note then an exchange rate gain or loss will be calculated, and
this is handled by the system for users when posting to the linked accounts system. There
are also two user reference fields and a large notes box here too.

Once saved users can then move on to matching this invoice (or credit) with the relevant
receipt(s) (or returns) by clicking on the ‘Matching’ tab and then the ‘Add line’ button.
A list of any unmatched lines from goods received notes appears for the user to select, including the receipt cost value. This list can be filtered and sorted to make it easier to find the lines needed to
match to this invoice. Once selected the lines are returned to the ‘Matching’ tab.
If the invoice values and the receipt values are the same, then clicking the ‘Commit’ button
will mark this invoice ready for posting to the linked accounts system at the next sync as
well as updating the receipt lines as ‘matched’.
If there is a variance between the invoice values and the receipt values, then these can be
entered in the ‘Variance’ column. If left here when the invoice is committed then the system
will try and update the valuation of those items whether they be parts, equipment, or
materials. With parts, if the item has already been sold and there are no more in stock then
the variance will be posted to a variance account nominated in the accounts settings (see
above).
If the user does not want to accept all or any of the variance this can be edited, and the
balancing value will be shown in the ‘OS Cost’ column awaiting matching to a future credit
note from the supplier.
If there are fundamental queries with an invoice (or credit) the user can mark the document
as such by using the ‘Query’ button.
