Batch Invoices
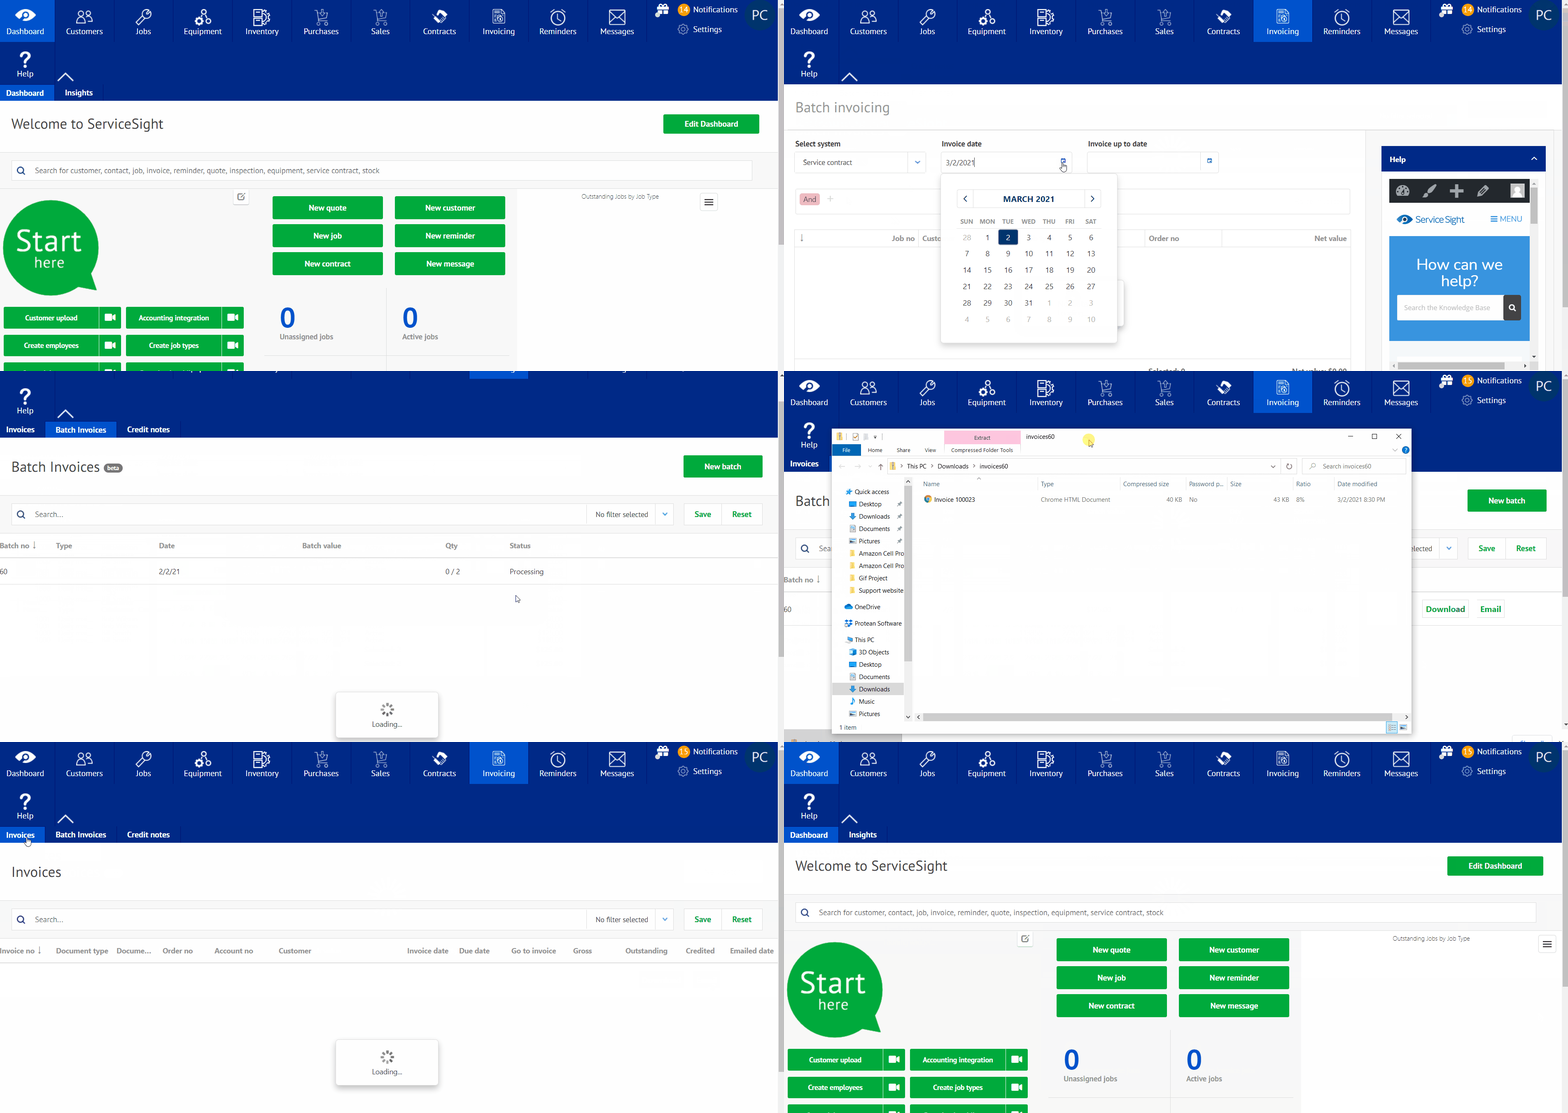
Batch invoices can be accessed by selecting the invoicing tab on toolbar on the top. Batch invoicing allows the user to generate multiple invoices from a single-entry input, allowing the user to skip manually entering information per individual invoice.
To access the feature, proceed with the following steps:
- On the home screen, select the invoicing.
- When in invoicing, select the tab labeled “batch invoices”.
- This will take you to the Batch Invoice screen where will be able to see all invoices batched. Start a batch, select the green tab labeled “New Batch”.
- Once in the new batch, you can select the system you plan on using (Job, Dispatch note, or Service Contract).
- Once selected, you can choose the invoice date and the invoice up to date.
- Below this section, there is a toolbar with the word “and”. Selecting this will allow the user to add conditions or groups for selecting invoices that need to be raised. Once selected, you can then choose invoice cycle, contract type, contract status, order number, or the number of the invoice.
- After this has been chosen, there will be an enter value box, different for each condition selected on page.
- Once selected, the page will automatically update and load invoices that follow the criteria selected.
- When loaded, you will have the choice to either discard or raise invoices.
- After raised, there will be a confirmation pop up to confirm. Select yes or no to move forward.
- The batch invoicing page will then show the status and batch number. You will be able to go about doing other work while the invoices are batched.
- Once completed, you will be able to either download or email the invoice batch. The batch will also show up on the phone application as well.

