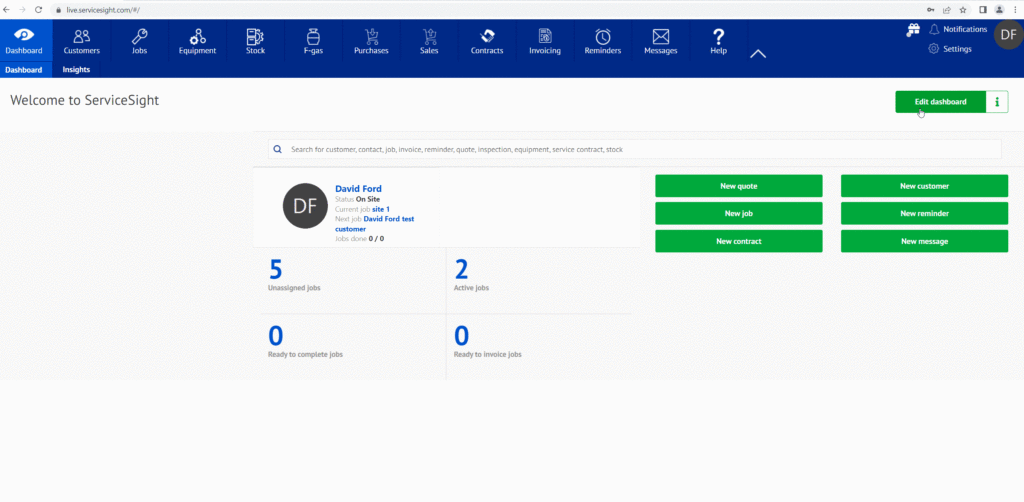
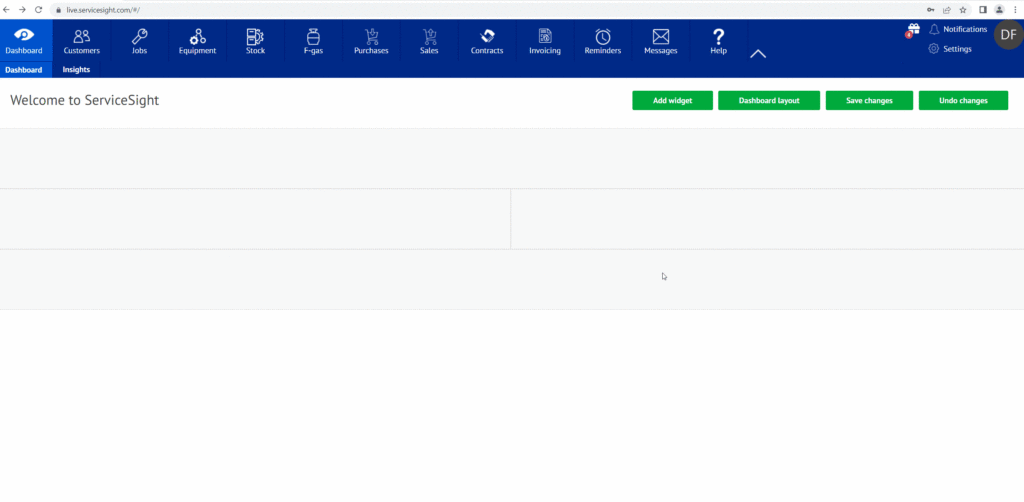
In order to Starting editing the dashboard you need to select Edit Dashboard
Once you have selected the edit dashboard you the selections at the top will change to allow you to start editing the dashboard
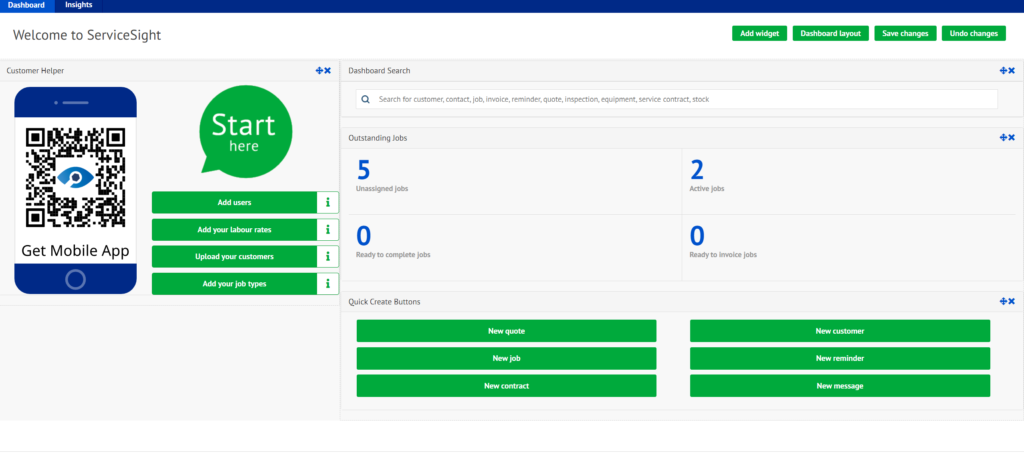
Add Widget
Click here to add one the widget types available to your dashboard.
Dashboard Layout
Click here to choose the layout for your dashboard from the options available. This will determine how many sections you want the dashboard divided into. You can also add a title to the dashboard here also. This is a good place to have your company or business name.
Save Changes
Use this button to save your changes to the dashboard layout, whether it be the layout itself or additional widgets or just moving widgets around into different locations.
Undo Changes
Use this button to return to the dashboard as it was prior to making any recent changes.
Selecting a Dashboard layout
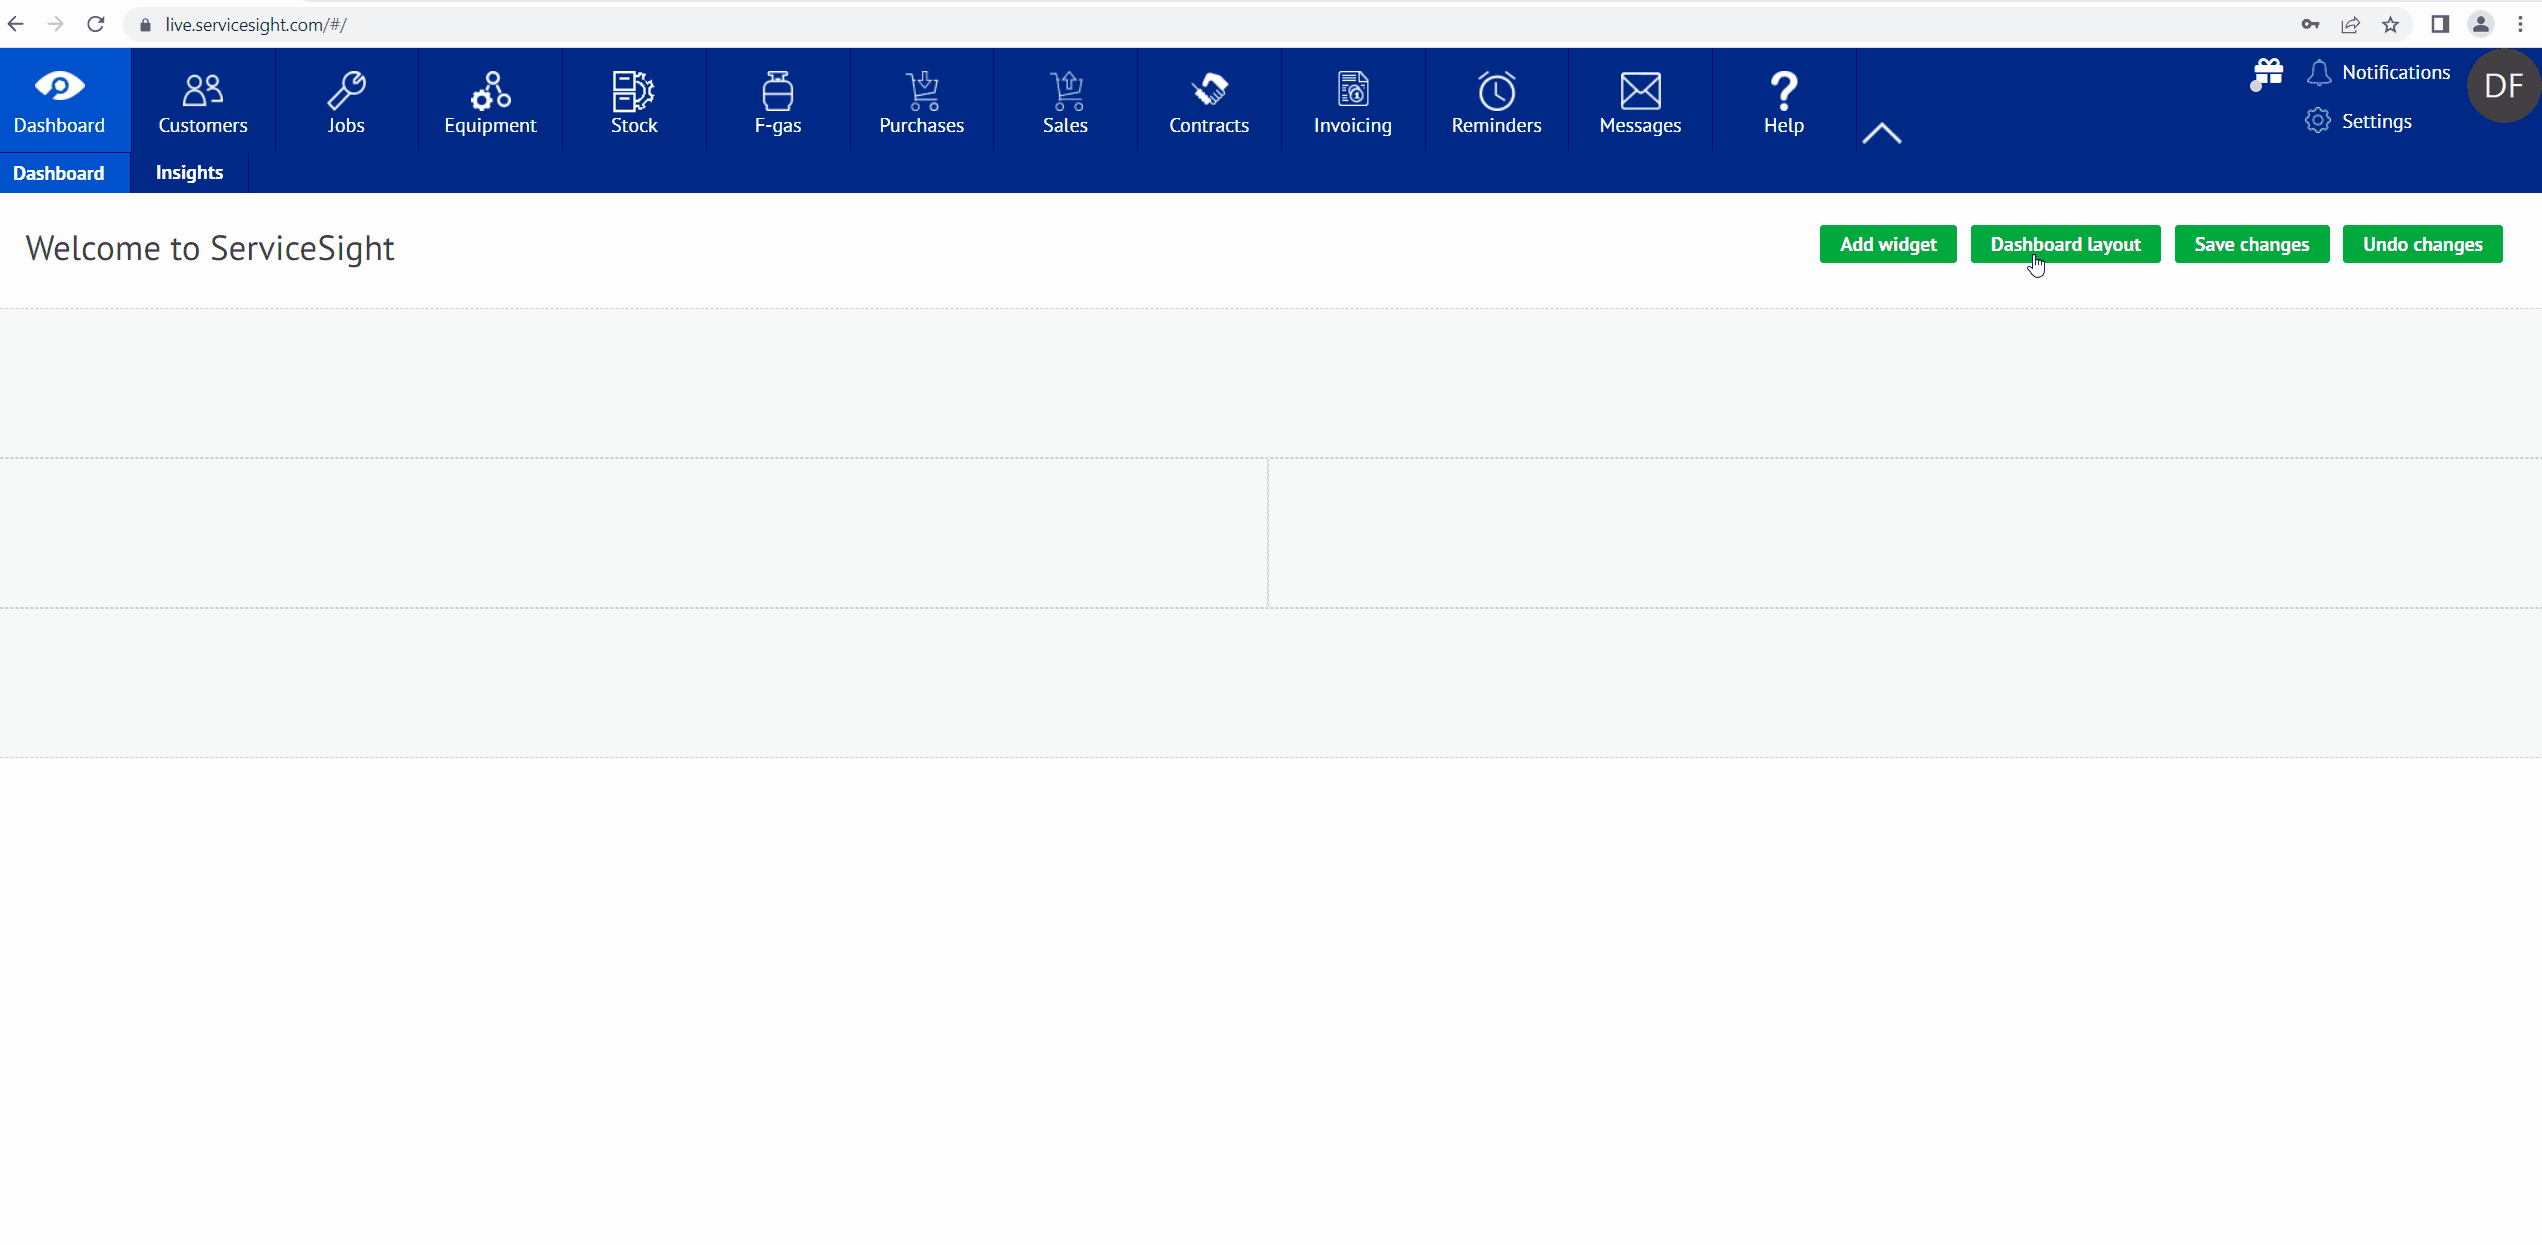
- Click the green ‘Dashboard Layout’ button.
- An edit screen opens with a title field & options for your layout to choose from.
- To enter a title for the dashboard type it in in the ‘Title’ field.
- Then select a layout by clicking on it and then hitting the ‘Close’ button. This will determine how your dashboard is configured and where you can add widgets
Selecting Widgets
- To add a widget click on it in the list that appears and it is added to your dashboard.
- Repeat for as many widgets as you need.
- For Charts, once selected, another screen appears where you can choose which chart you want to add and what its size should be (small, medium or large).
Once you have your Layout and your Widgets selected you can then amend them by simply selecting the change widget location and using a drag and drop function.