
The main function of this screen is to let you see planned jobs that have been allocated to you. Here you can sort & filter the list and access other features of the app such as messaging & creating new jobs yourself.
Date Filters
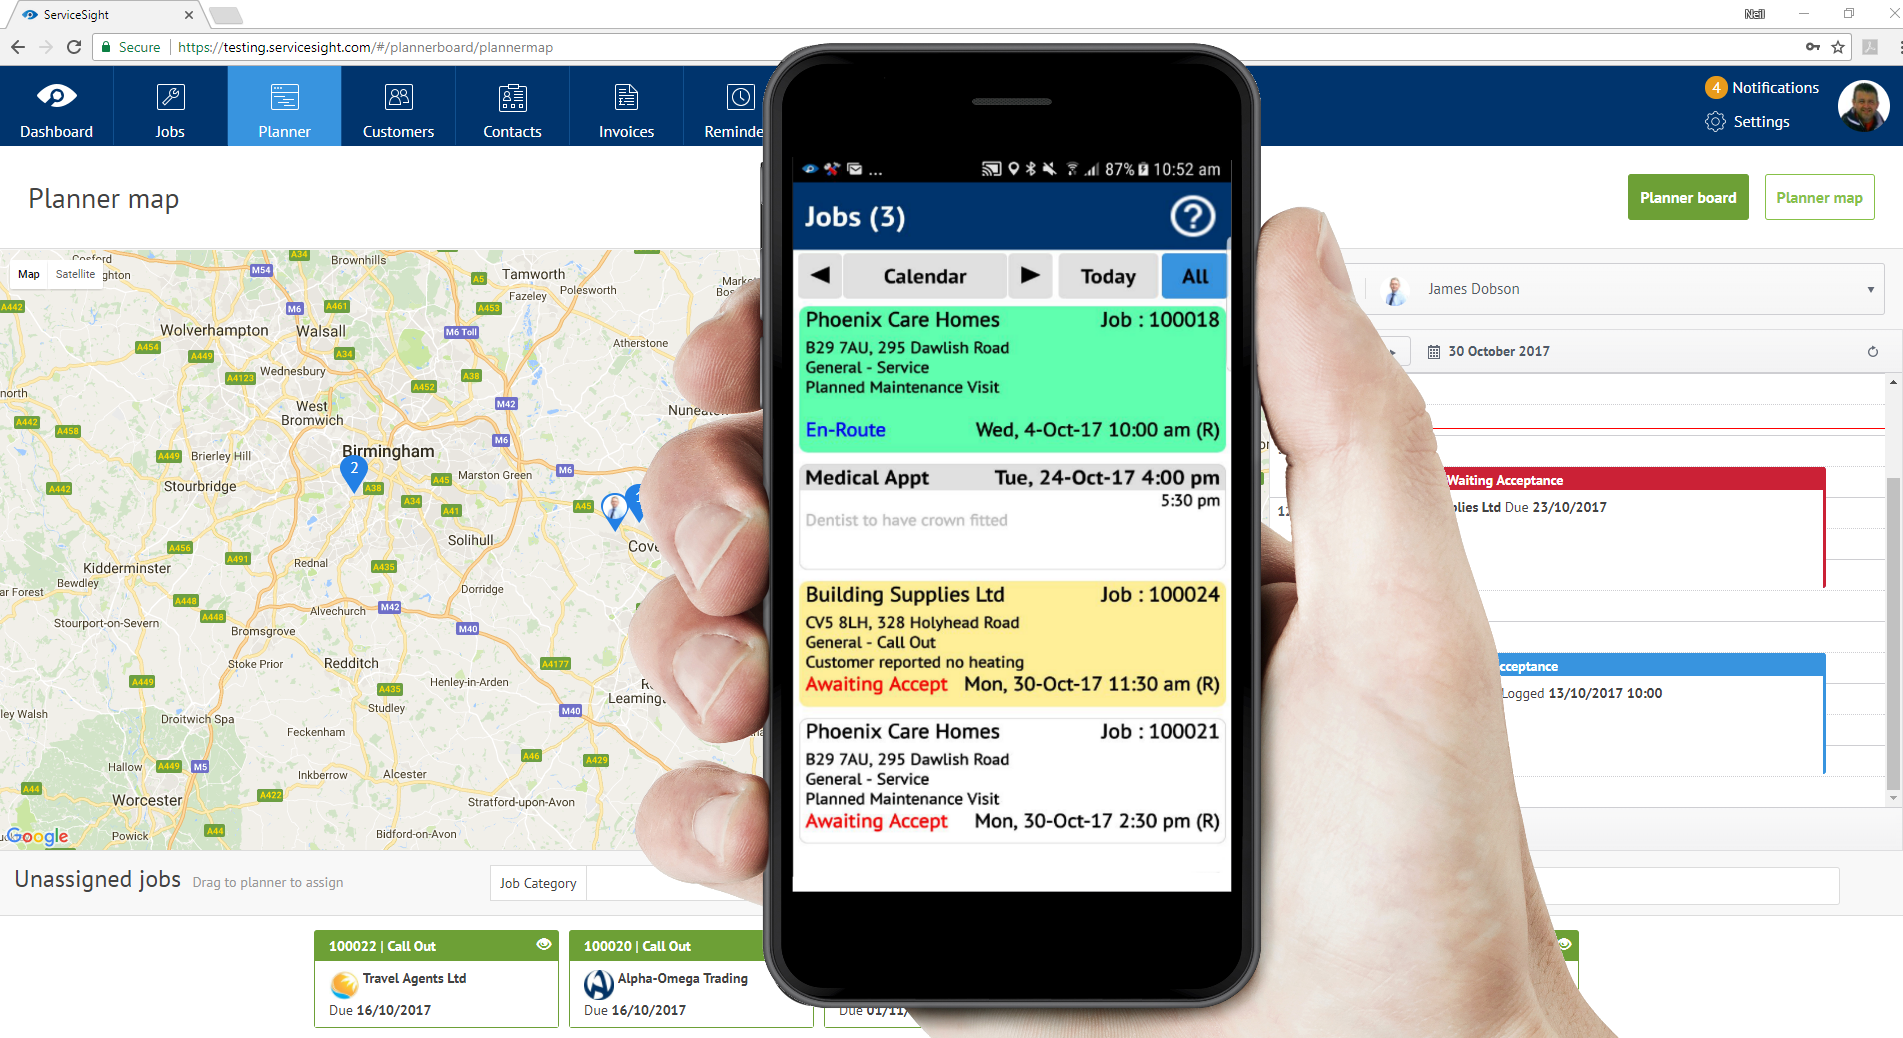
When you open your job list you will notice that the ‘All’ option is highlighted at the top of the screen. All jobs allocated to you are being shown in the list regardless of the date they are planned for. To change this you can either tap ‘Today’ to just see today’s jobs or tap the ‘Calendar’ button to pick any date from the calendar control to see jobs planned for you on that day.
Job Cards
In the large main window of the Jobs List you will see the cards representing your jobs. Each card shows you the vital information you need to know. Each job card can be tapped to enable you to access a menu of choices about that job. Each card shows:
Site Name; Job No; Post Code; First Line of Address; Job Group & Type; Work Required Description; Current Status; Date & Time Due
To see the details of any job simply tap it and then choose ‘Job Details’ from the menu that appears.
The cards are also colour coded. If they are red then this indicates that you are later than the required attendance time on the job. If they are yellow then your expected arrival is within one hour. A green job is the job you are currently travelling to/working on. White cards are jobs in the future that are planned for you.
Sorting
By default your list of jobs is sorted in date & time order with the oldest first. To access the sorting options tap the ‘menu’ button on your device (the three vertical dots in the top right-hand corner of the list screen). Then select ‘Sort By’. The sorting options are:
Job No; Post Code; Site Name; Job Status; Date & Time; Job Type
Creating New Jobs
To access the option of creating a new job tap the ‘menu’ button on your device (the three vertical dots in the top right-hand corner of the list screen). Then select ‘Create New’. You will then have three options available – Activity, Job & Message. Tap ‘Job’. You will then need to select a Site, Job Type, Date & enter a Work Description. Note that the Type & Date are populated for you assuming an immediate call out job. When ready, access the menu again and choose ‘Create Job’. The job will be created on the server and sent back to your device and will appear in the Jobs List.
Leave A Comment?