Sales Barrier
The sales barrier can be a reason added to a quote or customer to let users know why a particular customer might be hesitant, or even say no. This can assist users with assisting customers.
Creating a new sales barrier
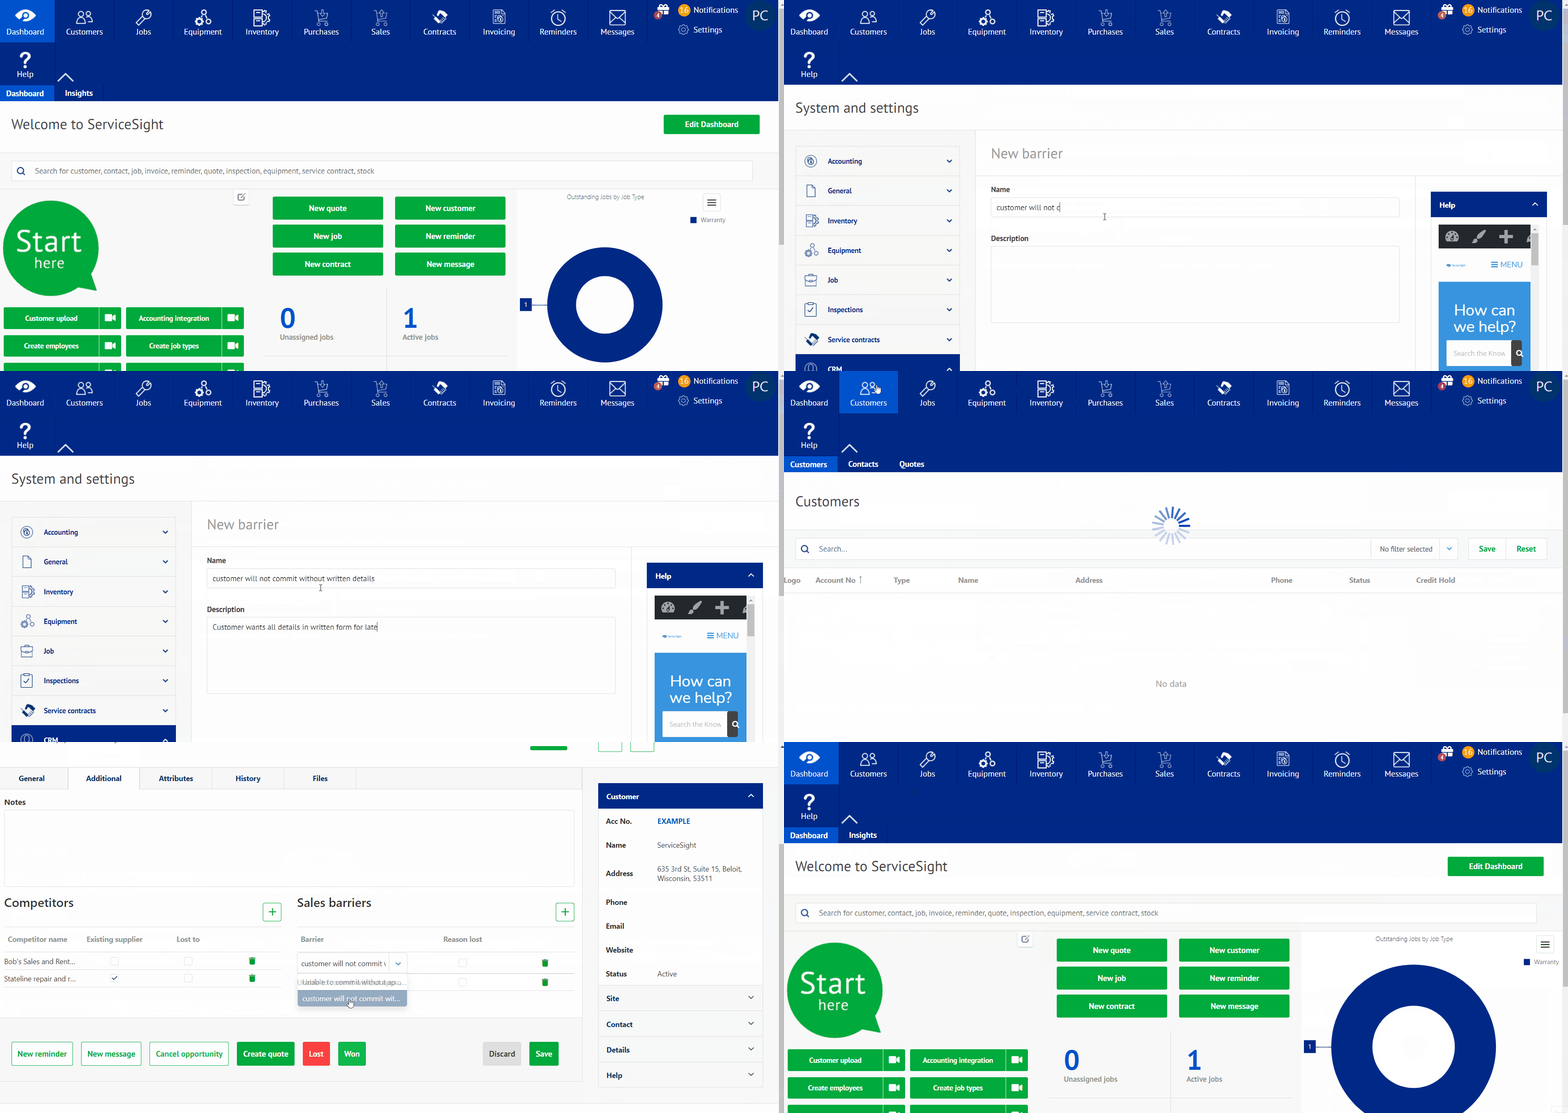
- Select the settings icon in the upper right hand corner of the ServiceSight home screen.
- Once in the settings screen, you will drop down menu’s for each setting. Select the tab labeled CRM, and it should drop down several tabs to choose from. Select sales barriers at this time.
- After selected, this will take you to the sales barriers page where barriers can be created and changed after being created.
- Once on this page, there is green tab at the top of the page labeled ‘New barrier’. Select this tab to start creating a new barrier.
- When this is selected, the first line to select is Name, which will allow you to put a name to the sales barrier.
- The next area is labeled notes, which will allow you to put notes for the barrier.
- Once these are done, you will be able to hit save and have completed creating a sales barrier to be added to customers.

