
Once on site, or on completion of the job, details of the work carried out & materials fitted, are entered as required against the job. The next section will describes completing jobs. To begin completing a job, do the following:
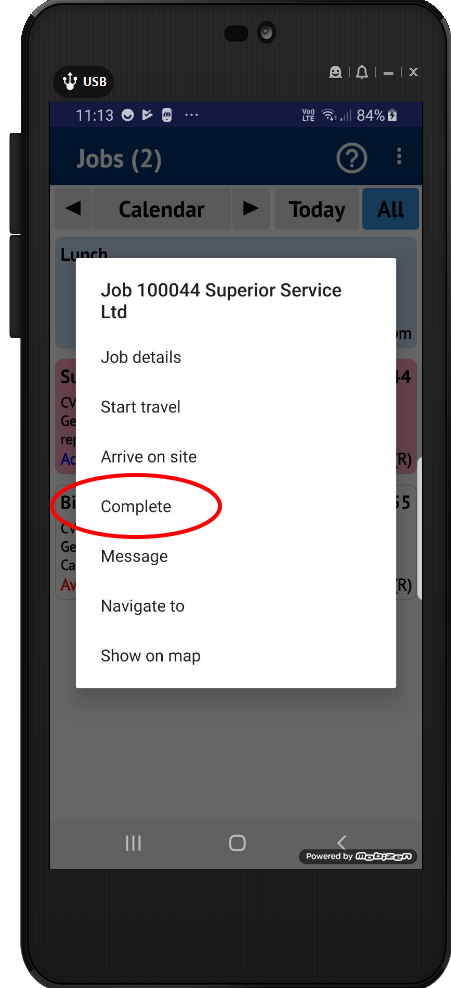
- Navigate to the Jobs Screen.
- Tap the job that needs to be completed.
- Tap ‘Complete’ on the menu that appears.
Note that you can complete a job without using the ‘Start Travel’ & ‘Arrive On Site’ options if desired.
Report Tab
The initial screen displayed is the Work Report screen. This is where the details of the work carried out are recorded.
- The Job Type is displayed & can be changed here if required by tapping on the field and opening the list of available job types to choose from.
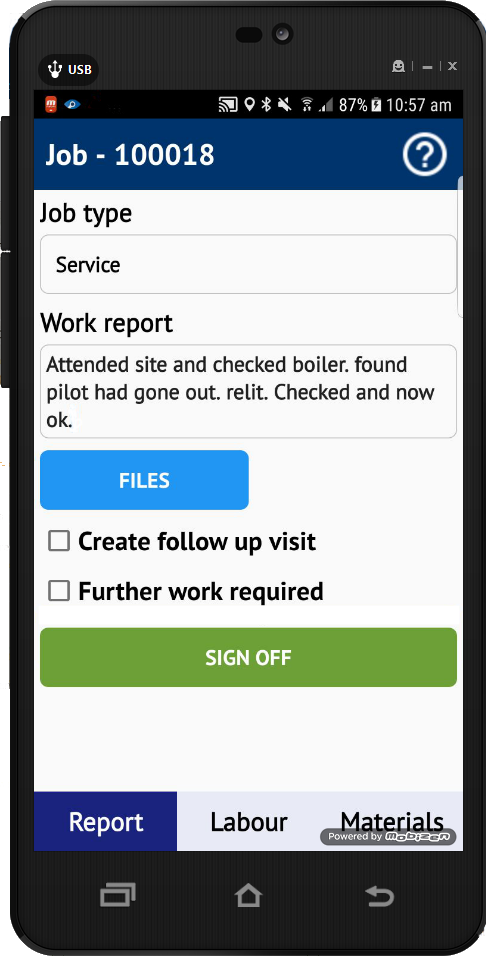
- In the Report box enter a report of the work you carried out. You can either use the onscreen keyboard to enter your report, or dictate your report to the device by tapping & holding the microphone icon on the keyboard.
- If required documents, pictures and other files can be attached to the job from here. Use the blue ‘Files’ button to open the selection screen. These attachments will be permanently attached to the job and can be viewed by other technicians and office users.
- If the job requires a follow up visit, tick the ‘Create Follow Up Visit’ box. This creates a 2nd visit against the same job number and automatically assigns it to you for the following day. A follow up visit maybe required if you needed to return to the site the following day to complete work or are working past midnight. The 2nd visit will appear on your device after signing and completing the job.
- If further work is required, place a tick in the box labelled ‘Further work required’ and enter the details in the ‘Work Description’ box below. The ‘Materials’ button also become available, and in the same way as materials are applied to a visit they can be pre-assigned to the ‘further work’ visit. When this further work information is returned to the Job Controller, they can then decide if the further work needs to be added to the same job as a further visit or if a new job or quotation is to be raised.
Labor Tab
The labor tab allows labor times, travel and mileages to be entered against a visit.
- To enter the labor time, tap on the ‘Labor’ tab at the bottom of the visit record.
- The first field is the visit date, this should be checked to make sure it is correct and amended if necessary.
- Next, check your time on and off the job. Time is entered by tapping in the Time On/Off fields and adjusting the displayed time accordingly. The total time of the visit is calculated and displayed. Time On should be automatically populated with the time you arrived on site. Time Off can be filled in here by tapping on the field and using the selector to enter the time off. Note that there is an option to have this field auto-populated too when a customer signs off the job in which case your entry will be overridden. Check with your job controller if you are not sure.
- The travel time to and from site and miles traveled are also shown and can be amended if necessary.

Materials Tab
If any material items have been used during the visit these are added to the job by tapping on the ‘Materials’ tab.
Materials are handled either on a per job basis.
- To manage materials on a job select the job, tap complete and tap the ‘Material’ tab at the bottom of the screen.
- The app presents a list of materials already on that job.
- To add an item to this list, tap the ‘Add’ button.
- The ‘Add Materials’ screen will now appear.
- Enter the description of the item.
- Tapping on ‘Clear’ removes all text from the box.
- When you have finished tap the green ‘OK’ button.
Sign Off
Once work is complete the job should be signed off by the technician and a signature should also be collected from the customer.
To sign off the job:
- Locate the job in the list and tap Complete.
- Tap the ‘Sign Off’ button located at the bottom of the screen.
The system produces a job sheet which displays the times and technician work report along with any materials used.
Once these details have been confirmed as correct, the user can collect a signature from the customer.
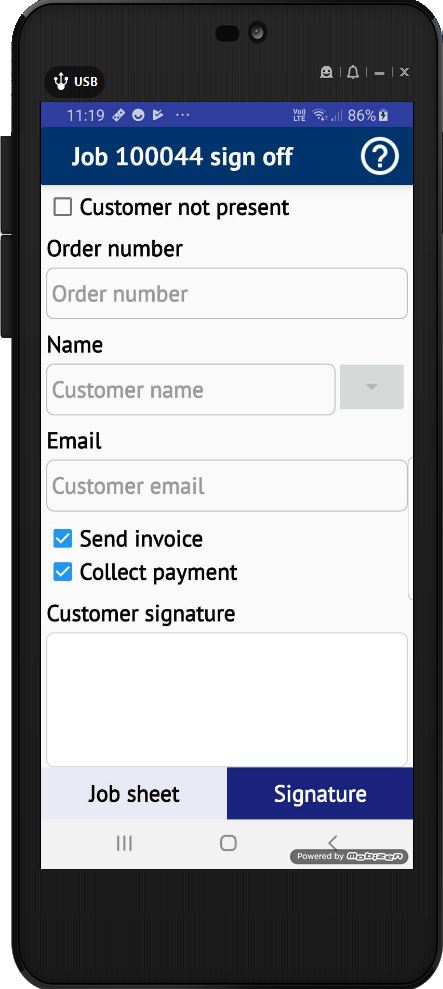
- Tapping the Signature button at the bottom of the screen displays the Sign Off screen itself.
- Note that the job can be marked as ‘Customer Not Present’, this allows the job to be completed without a signature being collected.
- Enter an Order number if needed. This allows a customer’s order number to be entered if it was not present when the job was created.
- Drop down the list of names available to select from. This allows the user to select the contact at the site is signing the work off. This can be selected from the drop down list or the name can be typed directly by tapping the name field.
- The next 2 boxes display the customer and technician signatures once captured.
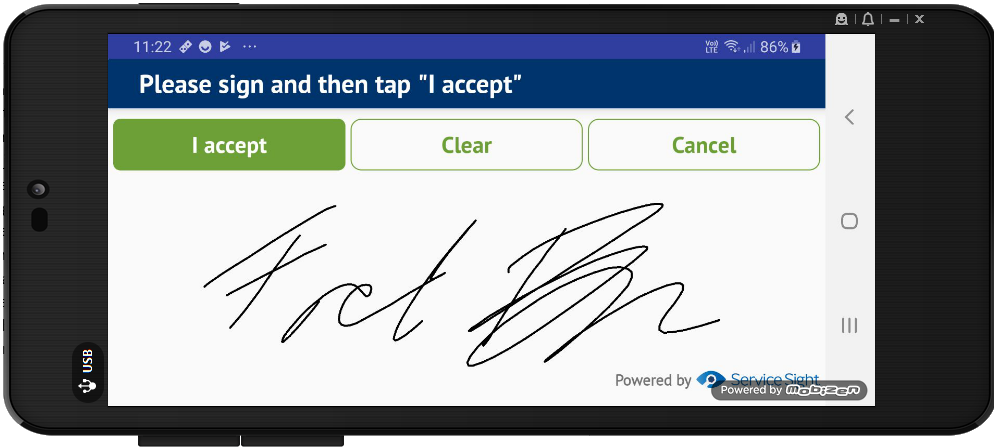
- Tapping the customer signature field changes the orientation of the device to landscape, allowing a larger input area for the customer to sign in.
- Once signed the ‘I Accept’ button should be tapped and the user is taken to the Signature screen so that the technician can then enter their signature.
- Once both signatures have been recorded, click the ‘Complete’ button to complete the job and send the details back to the office system.
Leave A Comment?