
Jobs List
Outstanding and current jobs are shown after tapping the Jobs Icon on the Main Menu. All current jobs are shown and by default are ordered by date with the earliest first. Each time a new job is received a notification is sent to the device to alert the engineer.
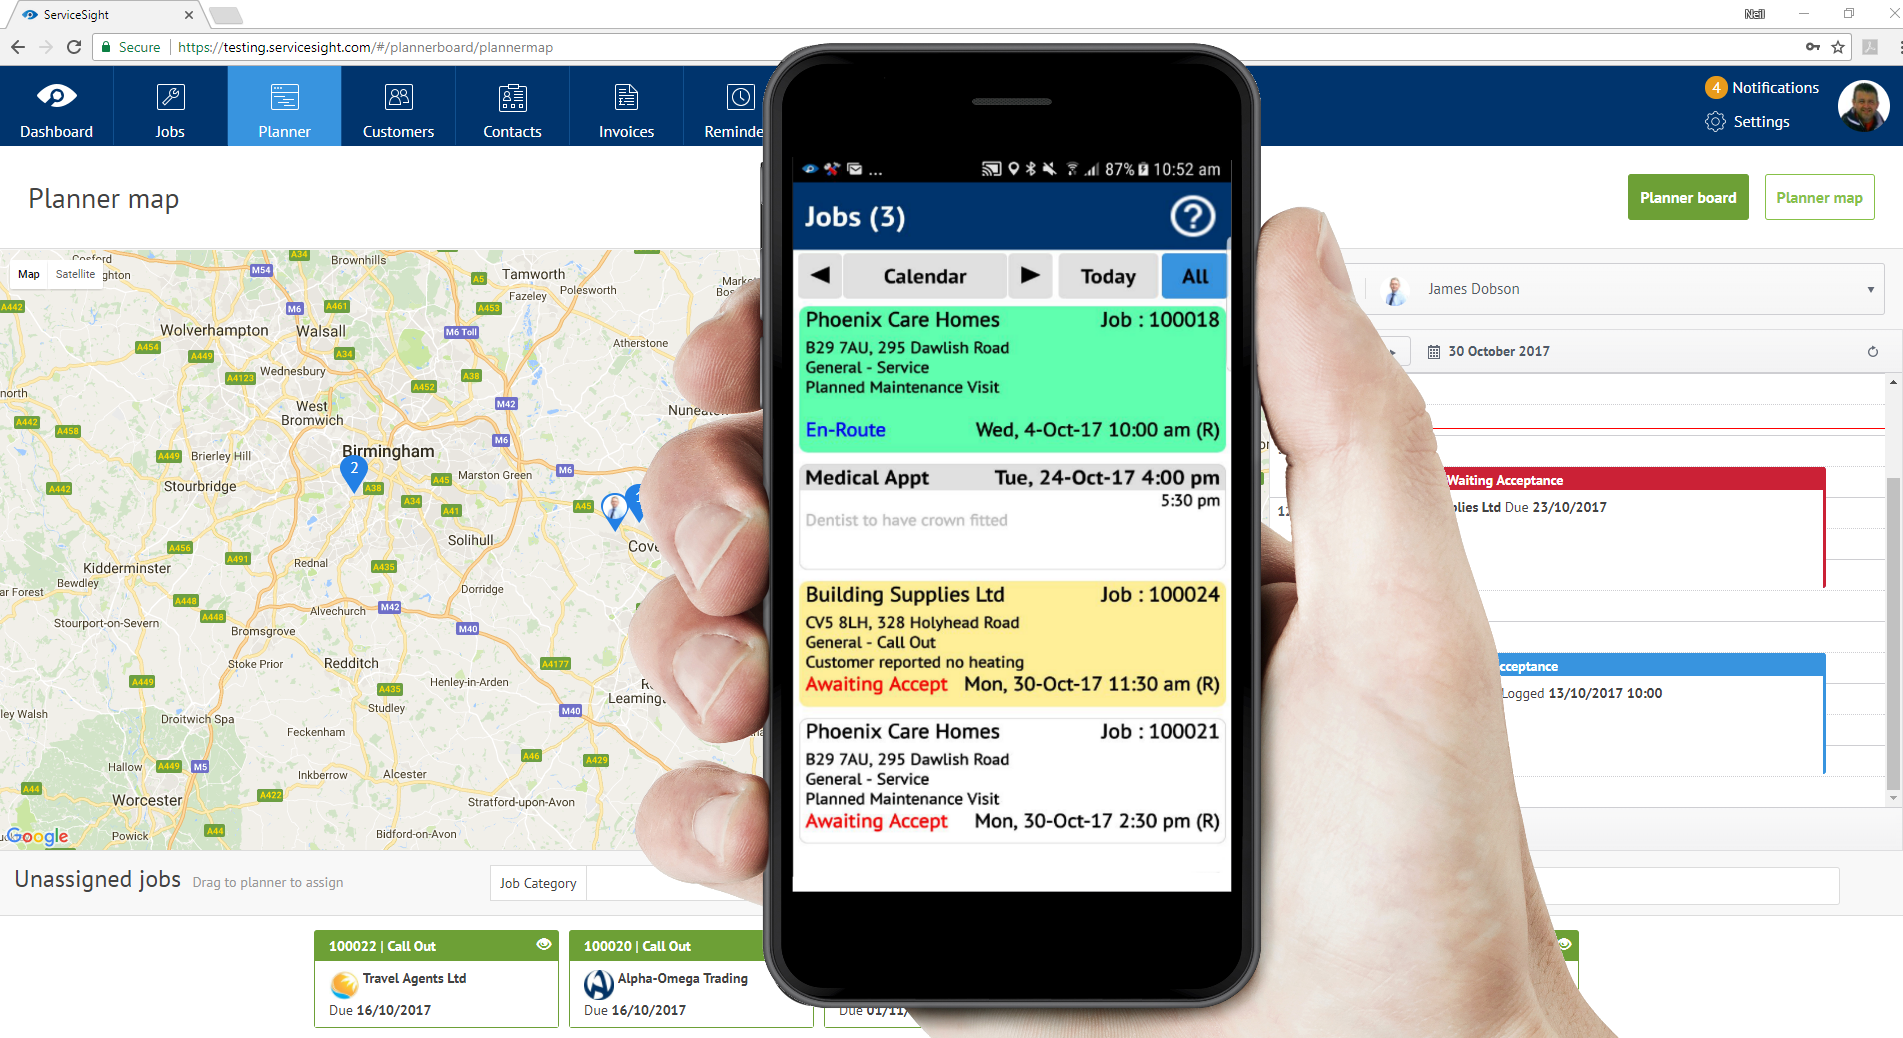
For each job, the following information is shown:
- Customer
- ServiceSight Job number
- Site zip code & first line of the address
- Job Type
- First line of content from the ‘To Do’ section of the job
- Date & time the job has been scheduled for
- Status
Possible job statuses are:
- Awaiting accept
- Accepted
- En-route
- On site
- Complete
Jobs are color coded depending on when they are due. The color coding is as follows:
- Red – Overdue, having been scheduled for a date/time in the past.
- Green – The job currently being worked on.
- Amber/Yellow – Due within the next hour.
- White – Scheduled, but, not yet due.
By default, all current jobs are displayed, the job list can be date filtered using the options at the top of the screen.
Calendar – Allows user to choose a date and display jobs only for that date.
Today – Shows only today’s jobs.
All – Shows all current jobs.
Additional options are available by pressing the menu button (three vertical dots in top right-hand corner). This will display a list of sub menu items at the bottom of the screen.
Inbox – This will take the user to the messages inbox.
Outbox – Takes the user to the messages outbox.
Create New – Allows the user to create a new Activity, Job or Message.
Refresh – Causes the app to re-synchronize its job data with the ServiceSight server immediately. The app will synchronize with the ServiceSight server at pre-defined intervals, the refresh option forces this to happen when tapped.
Sort By – Allows the user to change the sort order for jobs, to sort by Zip Code, Site, status etc.
Hide Completed Items – Toggles the ability to show completed jobs in the list or hide them. Showing them is useful if you need to fill out a time-sheet at the end of the week as you can refer back to the work you have done easily.
To begin working with a job, tap the entry in the job list. The user is presented with a popup menu displaying the options relevant to the selected job.
These options are contextual and the list presented to the user will depend on the current status of the job. Possible options displayed in this list are as follows.
- Job details – View details of the selected job
- Accept – Accept the selected job and notify Service Sight of ETA
- Message – Send an internal message regarding the job
- Navigate to – Use Google Maps to navigate to the job (This function will also work with other navigation software if it is installed on the device)
- Show on Map – View the site location via Google Maps
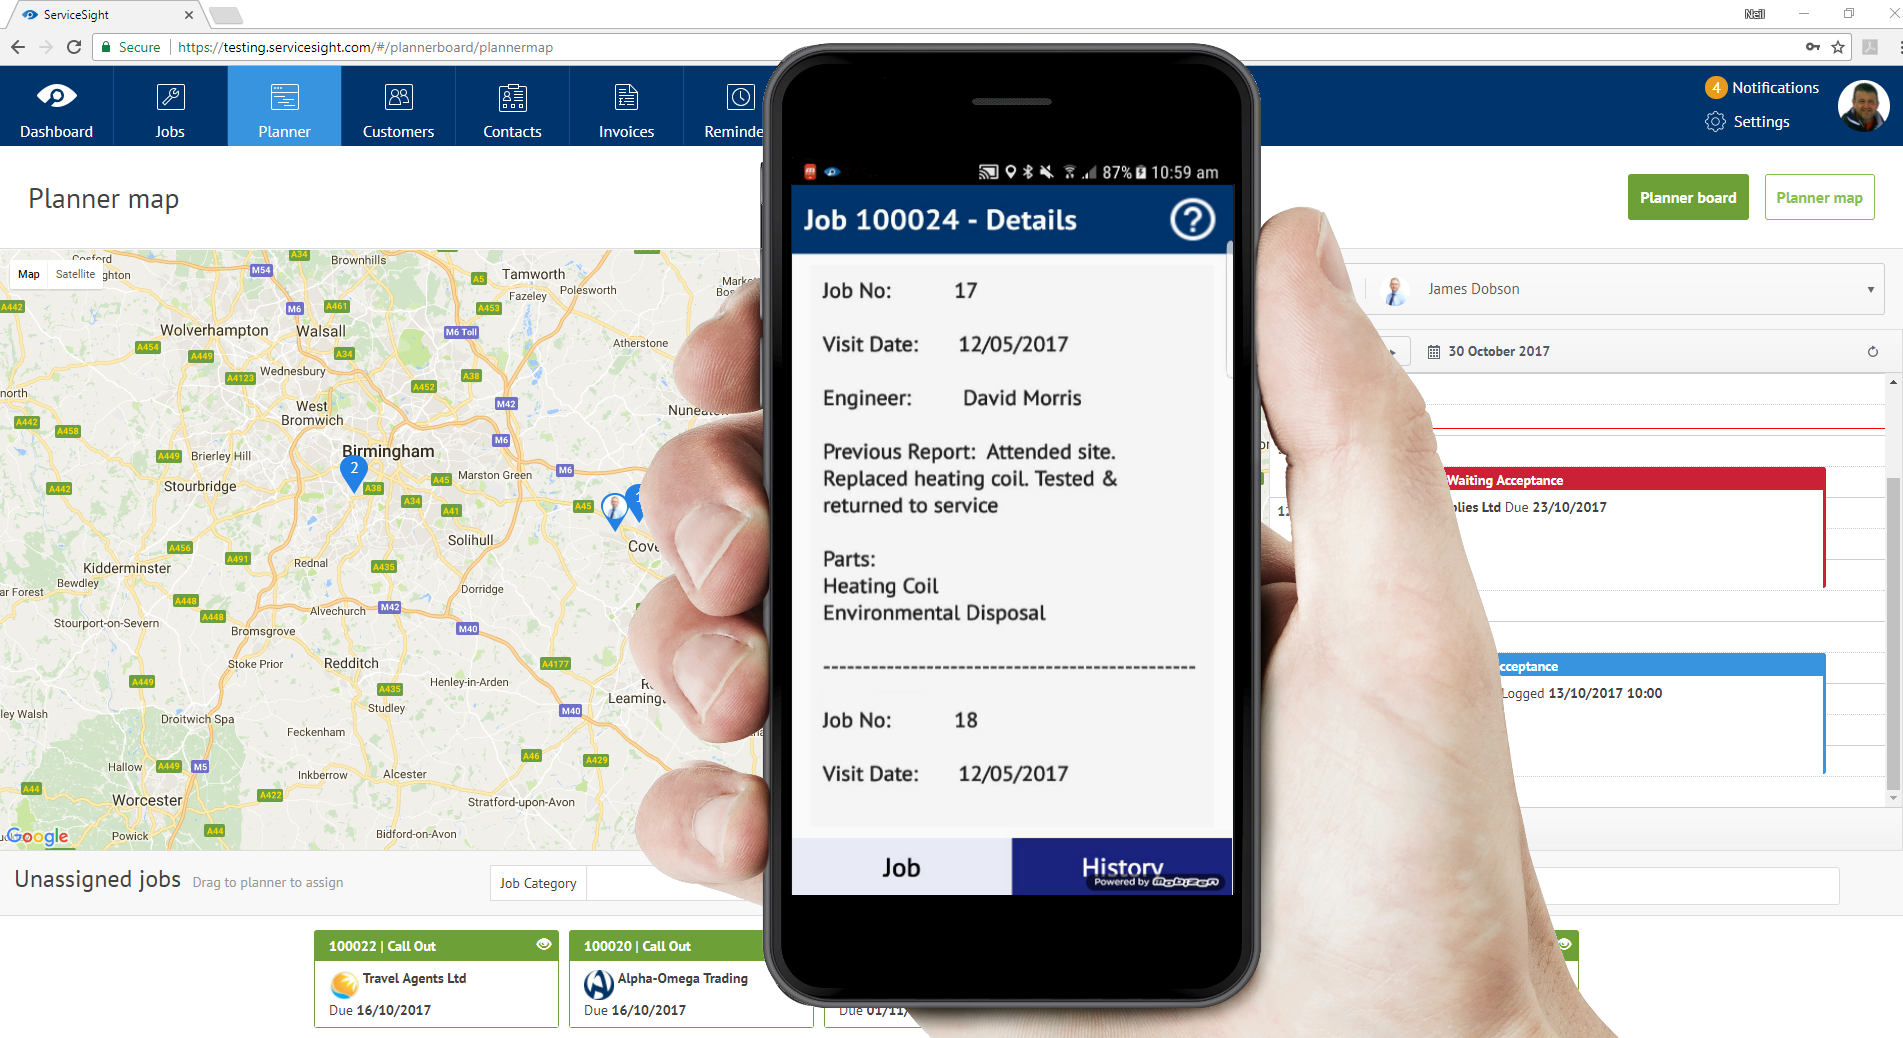
Job Details
Once the Job sub menu is tapped, Job details is the first option on the list of available actions. Tapping this option takes the user into the job itself, allowing them to view details of the job provided by the office.

Once accessed the user can navigate between areas of the job using the tabs at the bottom of the screen. The currently selected area is highlighted in blue.
The first tab is labelled ‘Job’ and contains the following information.
- Type – the job type set on the job and whether the job is chargeable
- Site name – Name of the site the job is located at.
- Site address – Address of the site at which the job is located, tap and hold the address to be given the option to view the location on a map or to launch Google’s navigation feature in Maps to direct you (This function will also work with other Sat Nav software if installed on the device).
- Contact – Name of contact at that site.
- Contact telephone – Telephone number for the on-site contact. The user can tap the telephone icon to call the contact from the app itself.
- Arrival Time (Response Time) – The arrival time that has been scheduled on the job.
- Allocated by – The user who allocated the job to the technician.
- Order No. – The Purchase Order number provided by the customer and entered on to the job.
- To Do – The contents of the ‘To do’ section of the job.
- Target Duration – Time based on that input when scheduling the job.
- Attachments – Job attachments can be viewed through the blue FILES button. By tapping the attachments button, all attachments on the job will be displayed. These can be downloaded individually by clicking on each respective item.
The second tab is labelled ‘History’ and contains a list of the last visits to this site so that you can review what happened, who the technician was, what parts they fitted and so on.
Accepting a Job
Once a job has been received, to acknowledge this, the user must accept the job. From the job screen, tap the job entry and then tap ‘Accept’.
The app then prompts for an estimated time of arrival.
- Confirm the date and the time you arrival on site is expected.
- To change the date or time simply tap on them for the selector to appear.
- Tap the green OK to update the ETA & accept the job.
The status of the job on the device will change from ‘Awaiting Acceptance’ to ‘Accepted’.